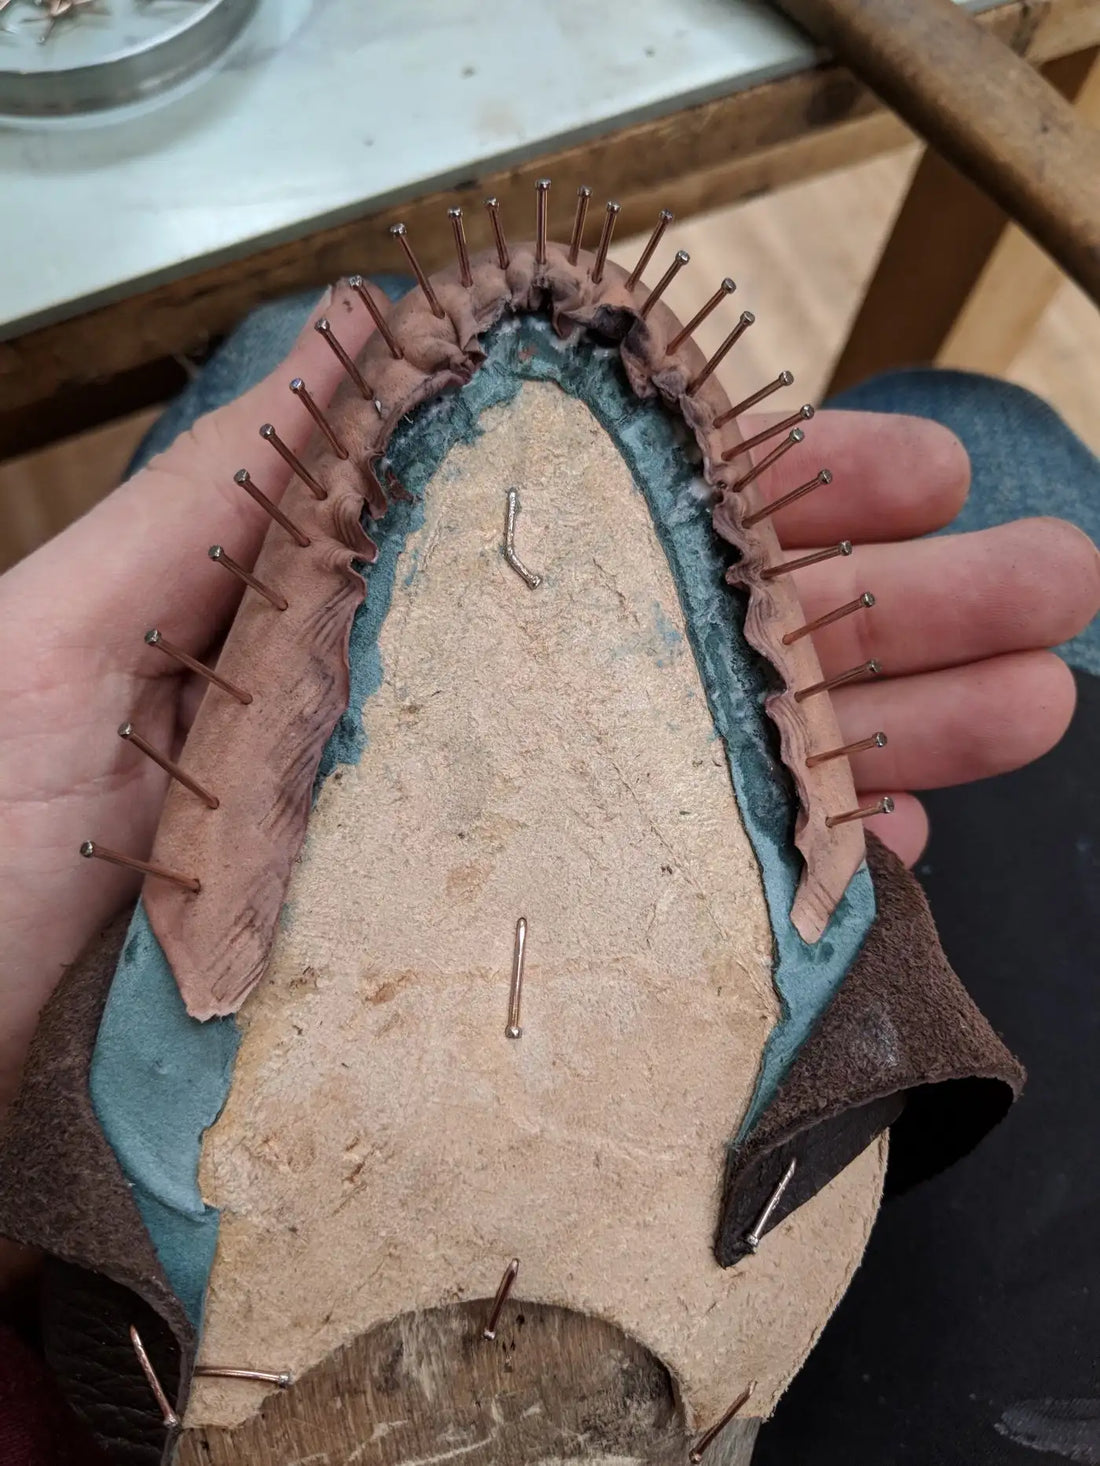
A last is the wooden form that a shoe is built around. The word “lasting” means stretching the leather of the the upper of the shoe around the last. The first week at the Stefano Bemer shoemaking school was mostly spent practicing lasting. One of the tenants of the school is repetition. The idea is that you do something often enough, you develop a feel for how to do things correctly. In the first week, we went from lasting just the upper, to lasting both upper and lining, to doing upper + lining while using stiffener, to upper + lining + stiffener + toe puff. That is what I will walk you through in this post.
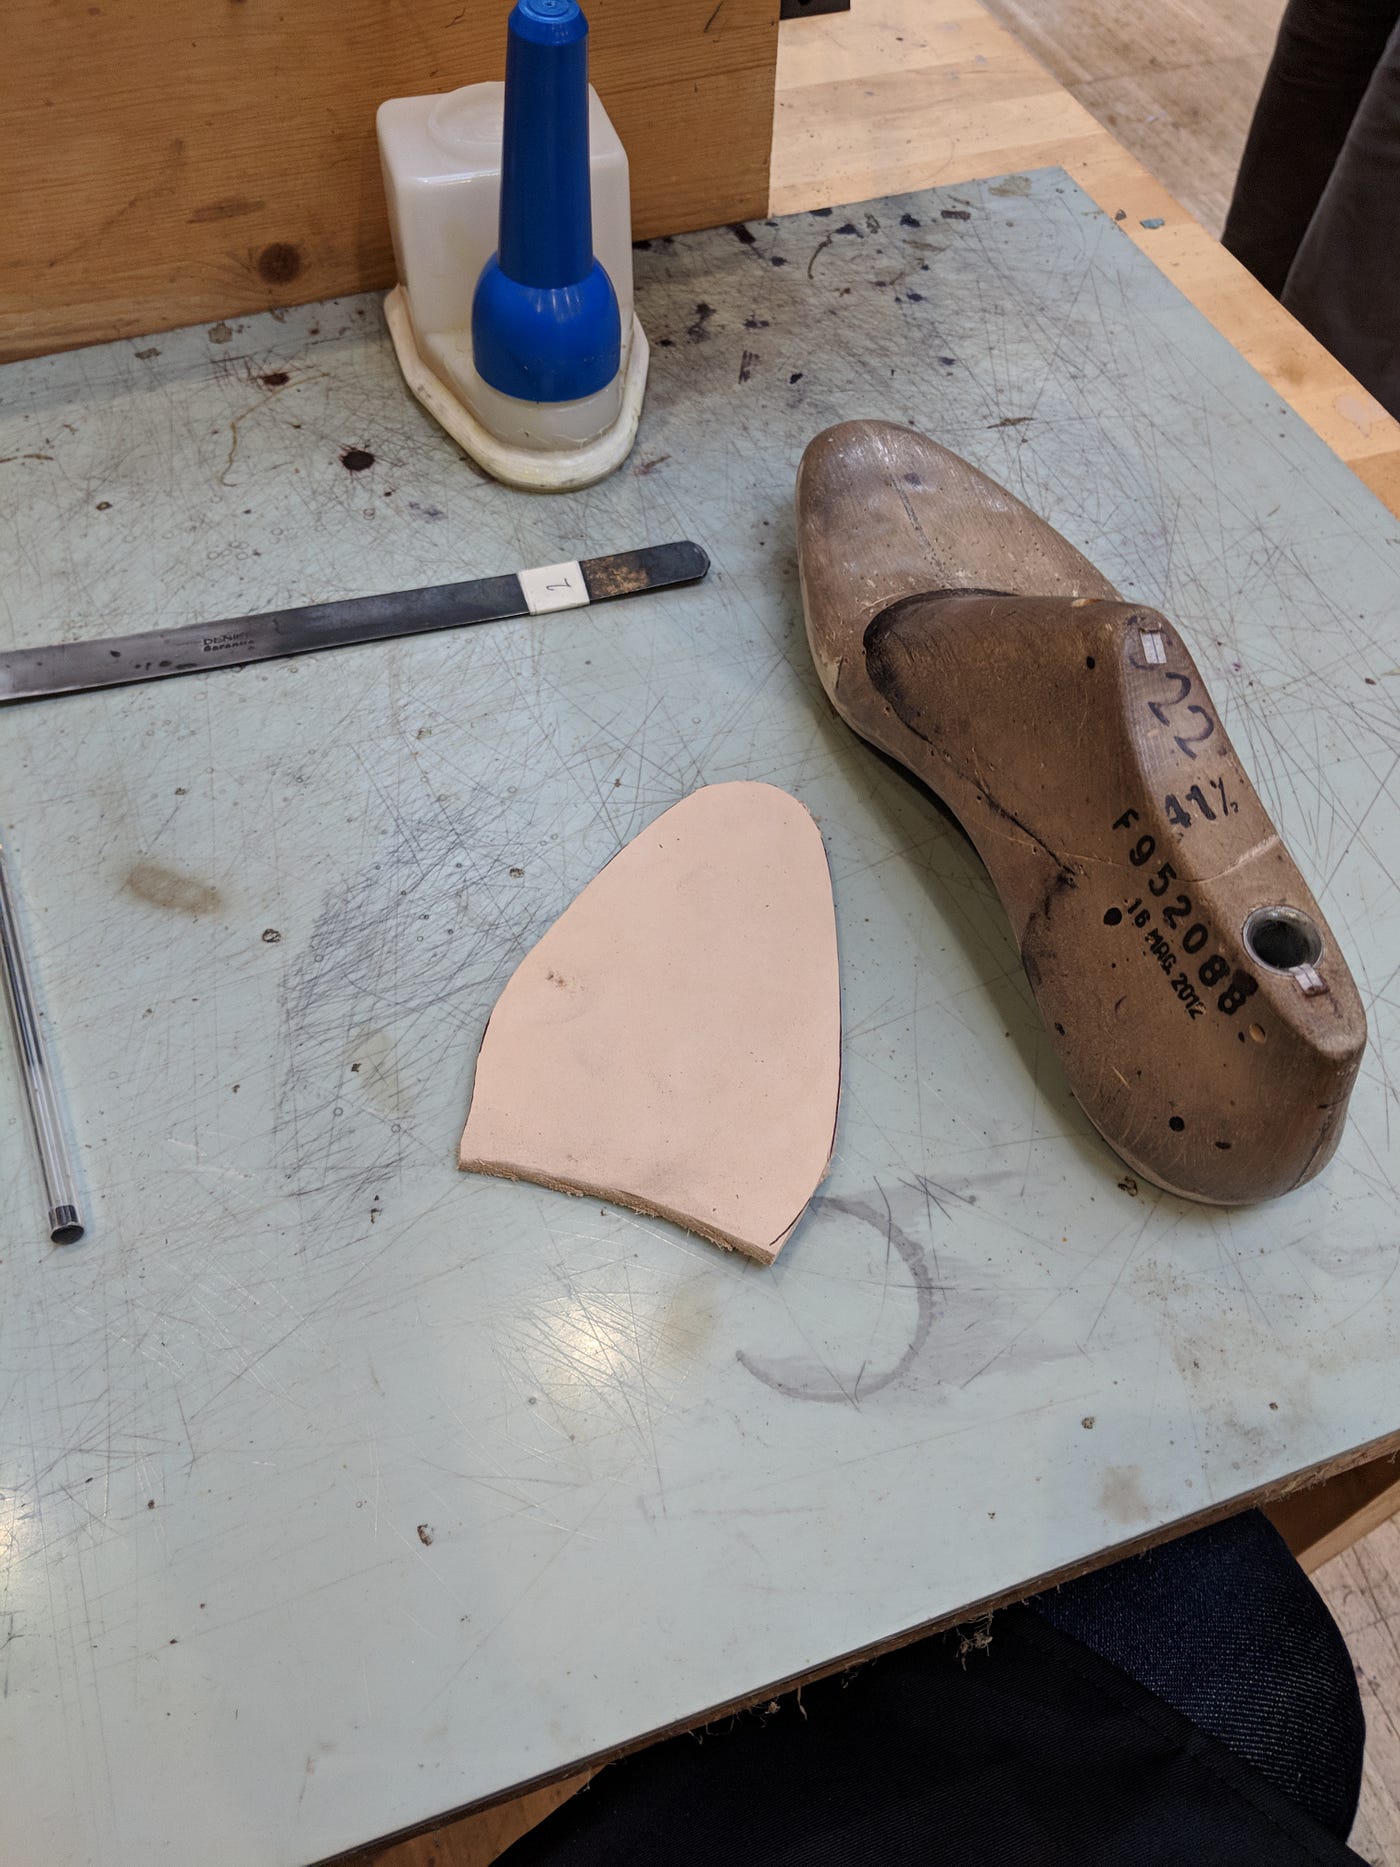
The first thing is to prepare an insole. You cut out a length of shoulder leather. It is important to use shoulder leather because it is quite thick and flexible. Make sure to cut generously, it is easier to cut it flush with the last later if you have a bit more to work with.
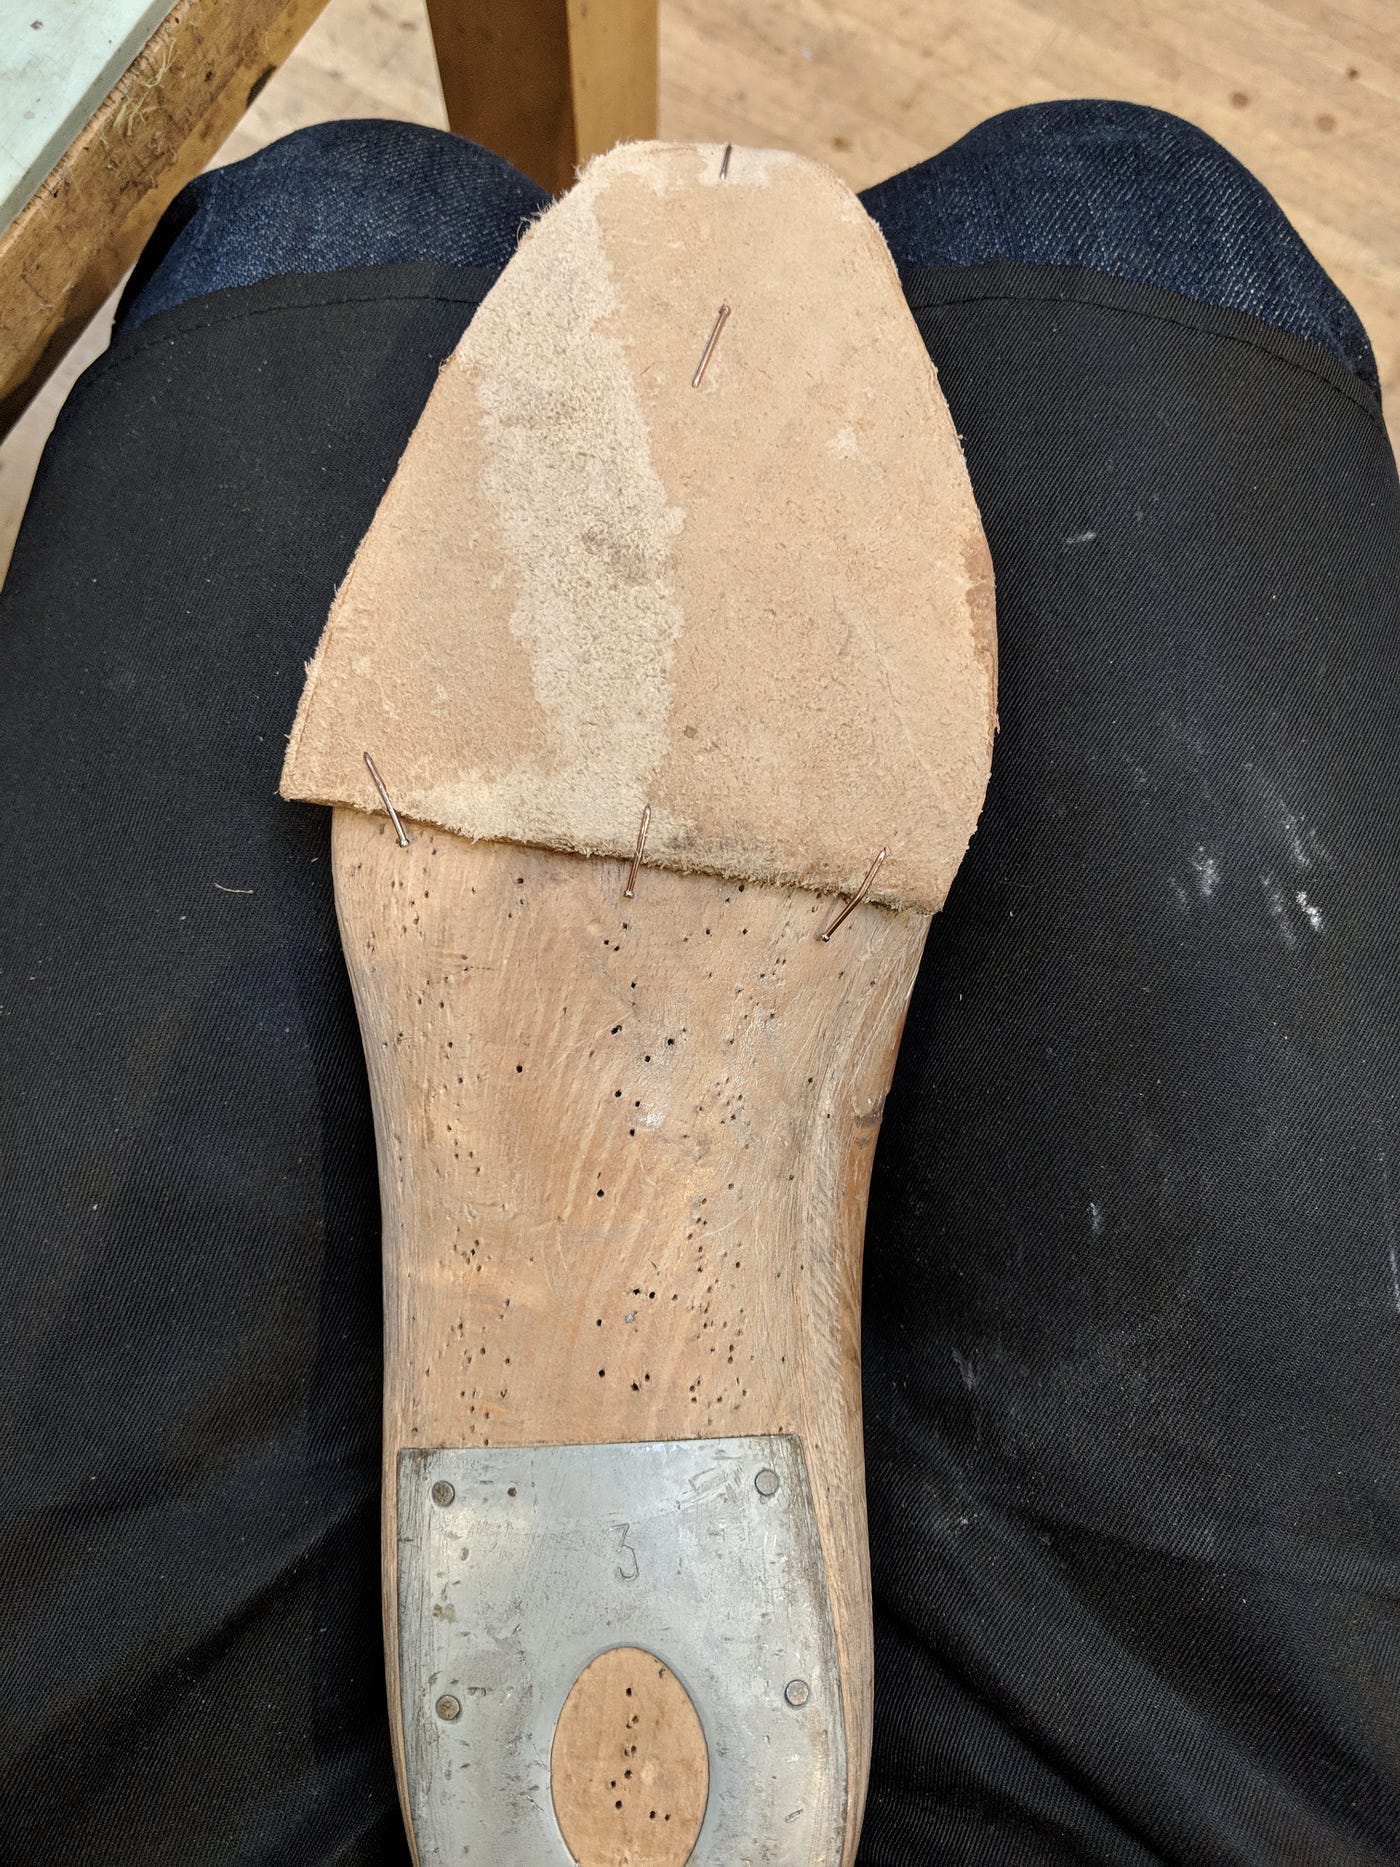
Attach it skin side to the last, flesh side up. It is important to attach a nail at the toe because it is difficult to bind there. Make sure to wet the skin side before attaching it, that will help the leather mold to the last.
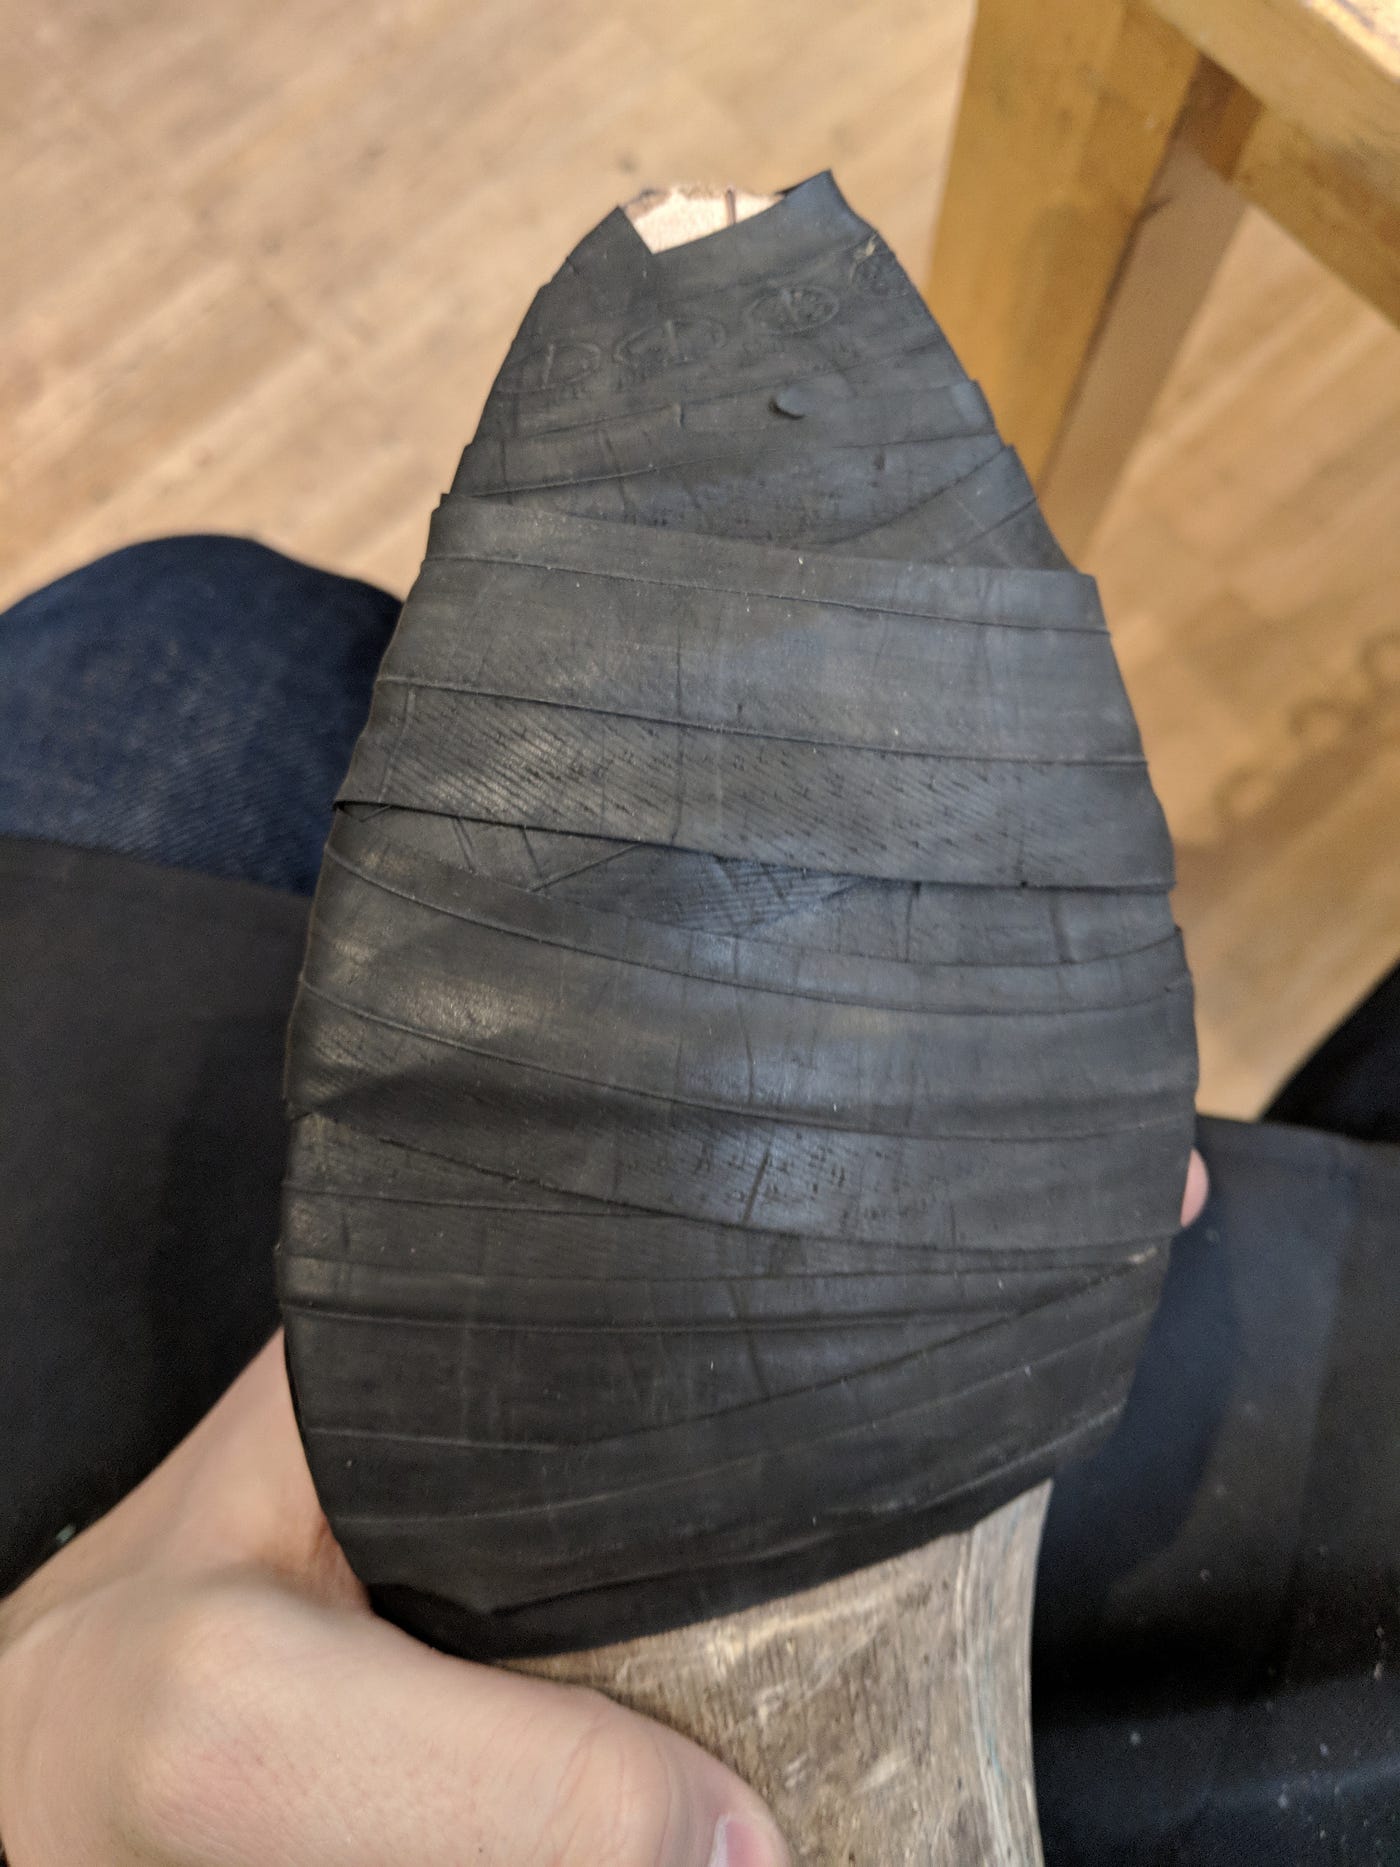
We use old bicycle tires to bind the insole to the last. You can use pretty much anything that will hold the shape. As the leather dries, it conforms to the shape of the last.
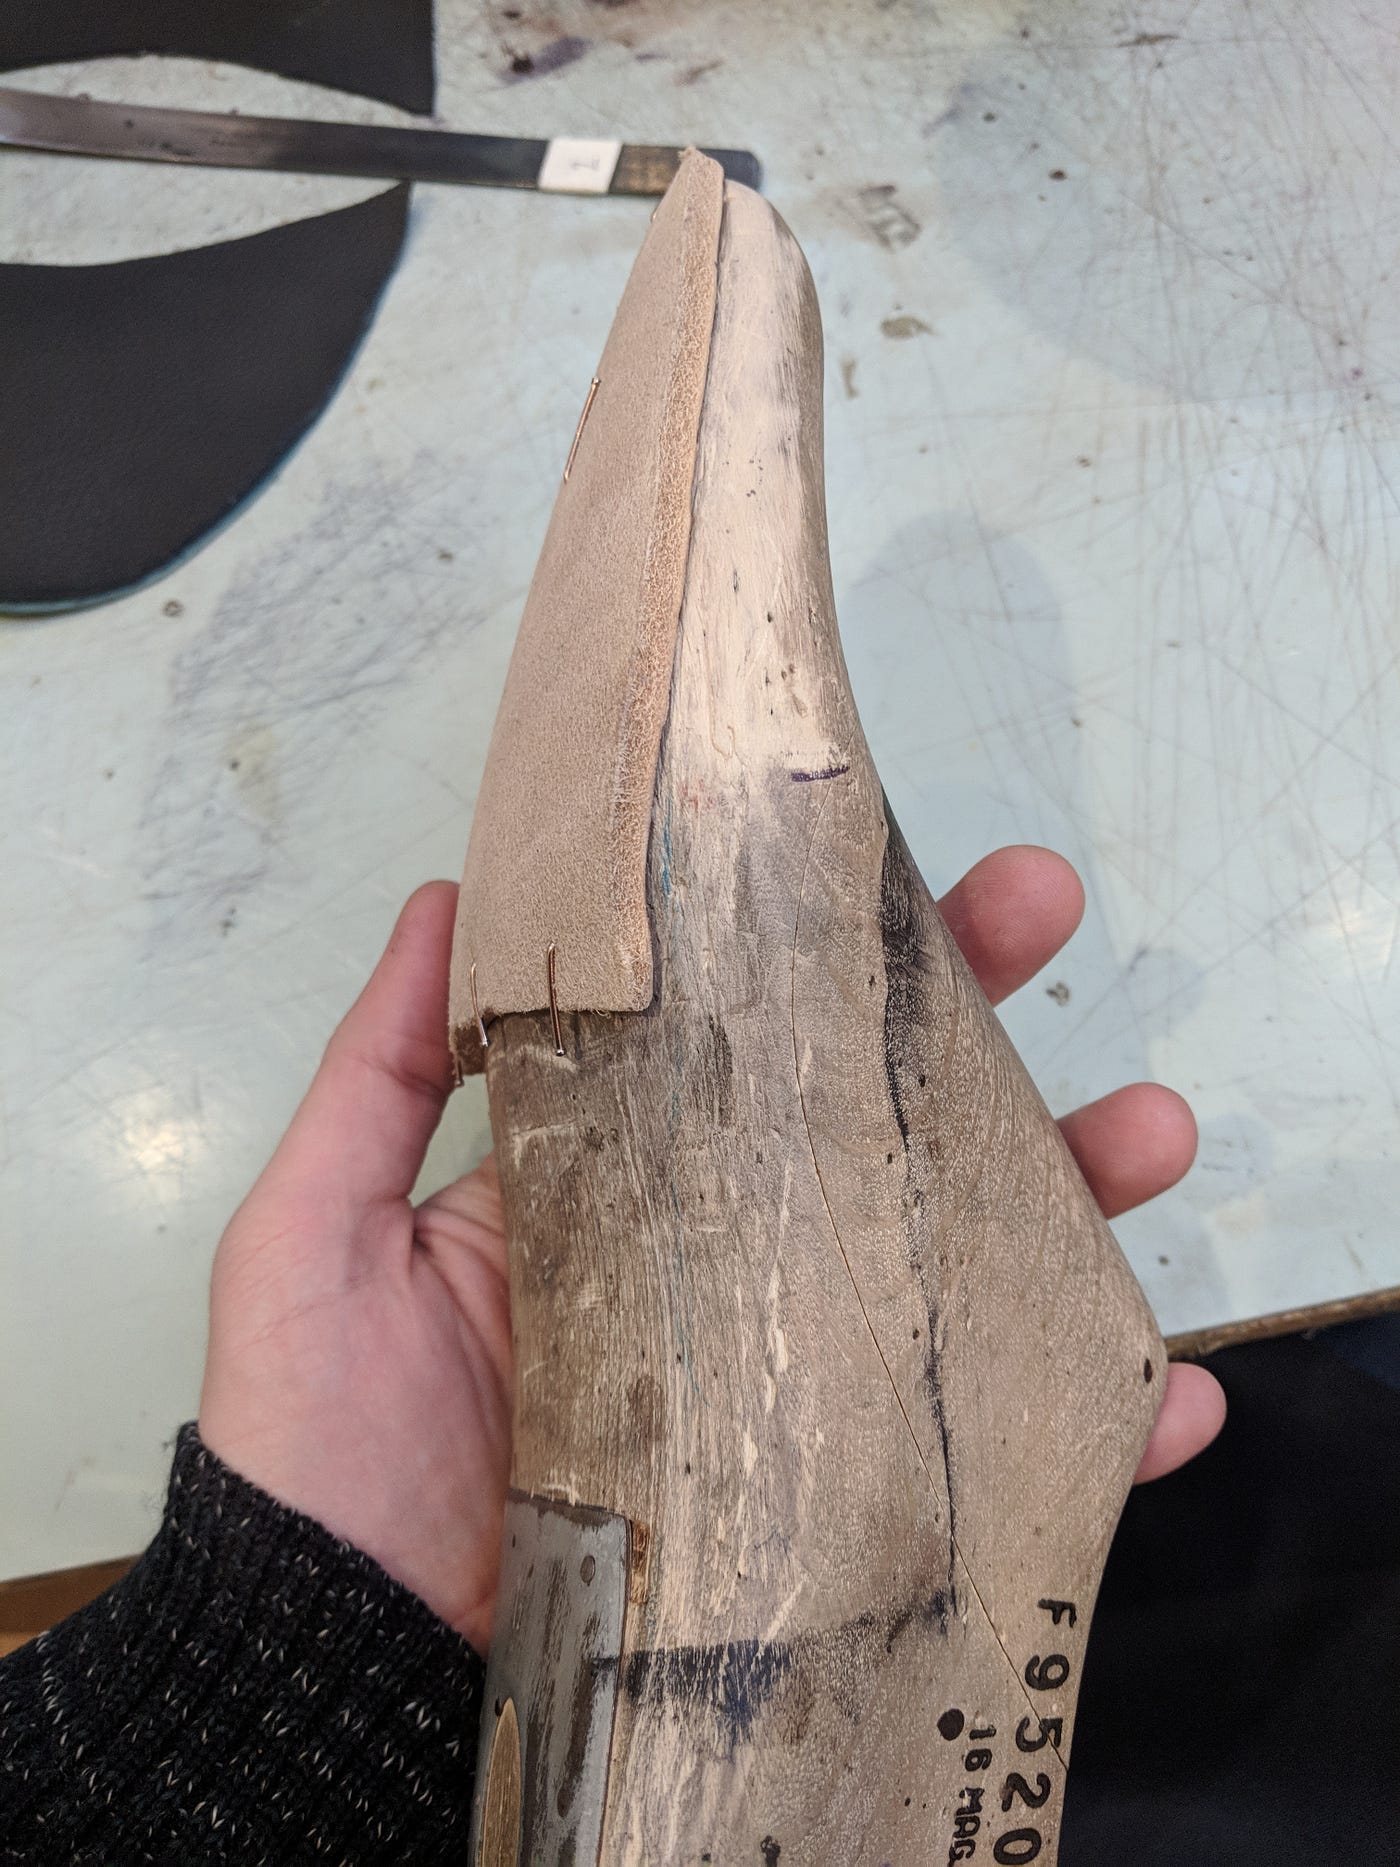
Once the leather is dry, you can take off the binding and trim the insole. It is important to trim the insole as if it is part of the last, it needs to be flush. You can run your finger along the sides and if you feel any bumps, get rid of them. You can use your knife, or a rasp, or sandpaper, or even a piece of glass. The insole will be what determines the outline of your shoe, so it is important that it is perfect.


This is a practice insole for lasting. When you prepare an insole with a channel, you need to leave a bit more leather at the toe, angled down with the shape of the last.
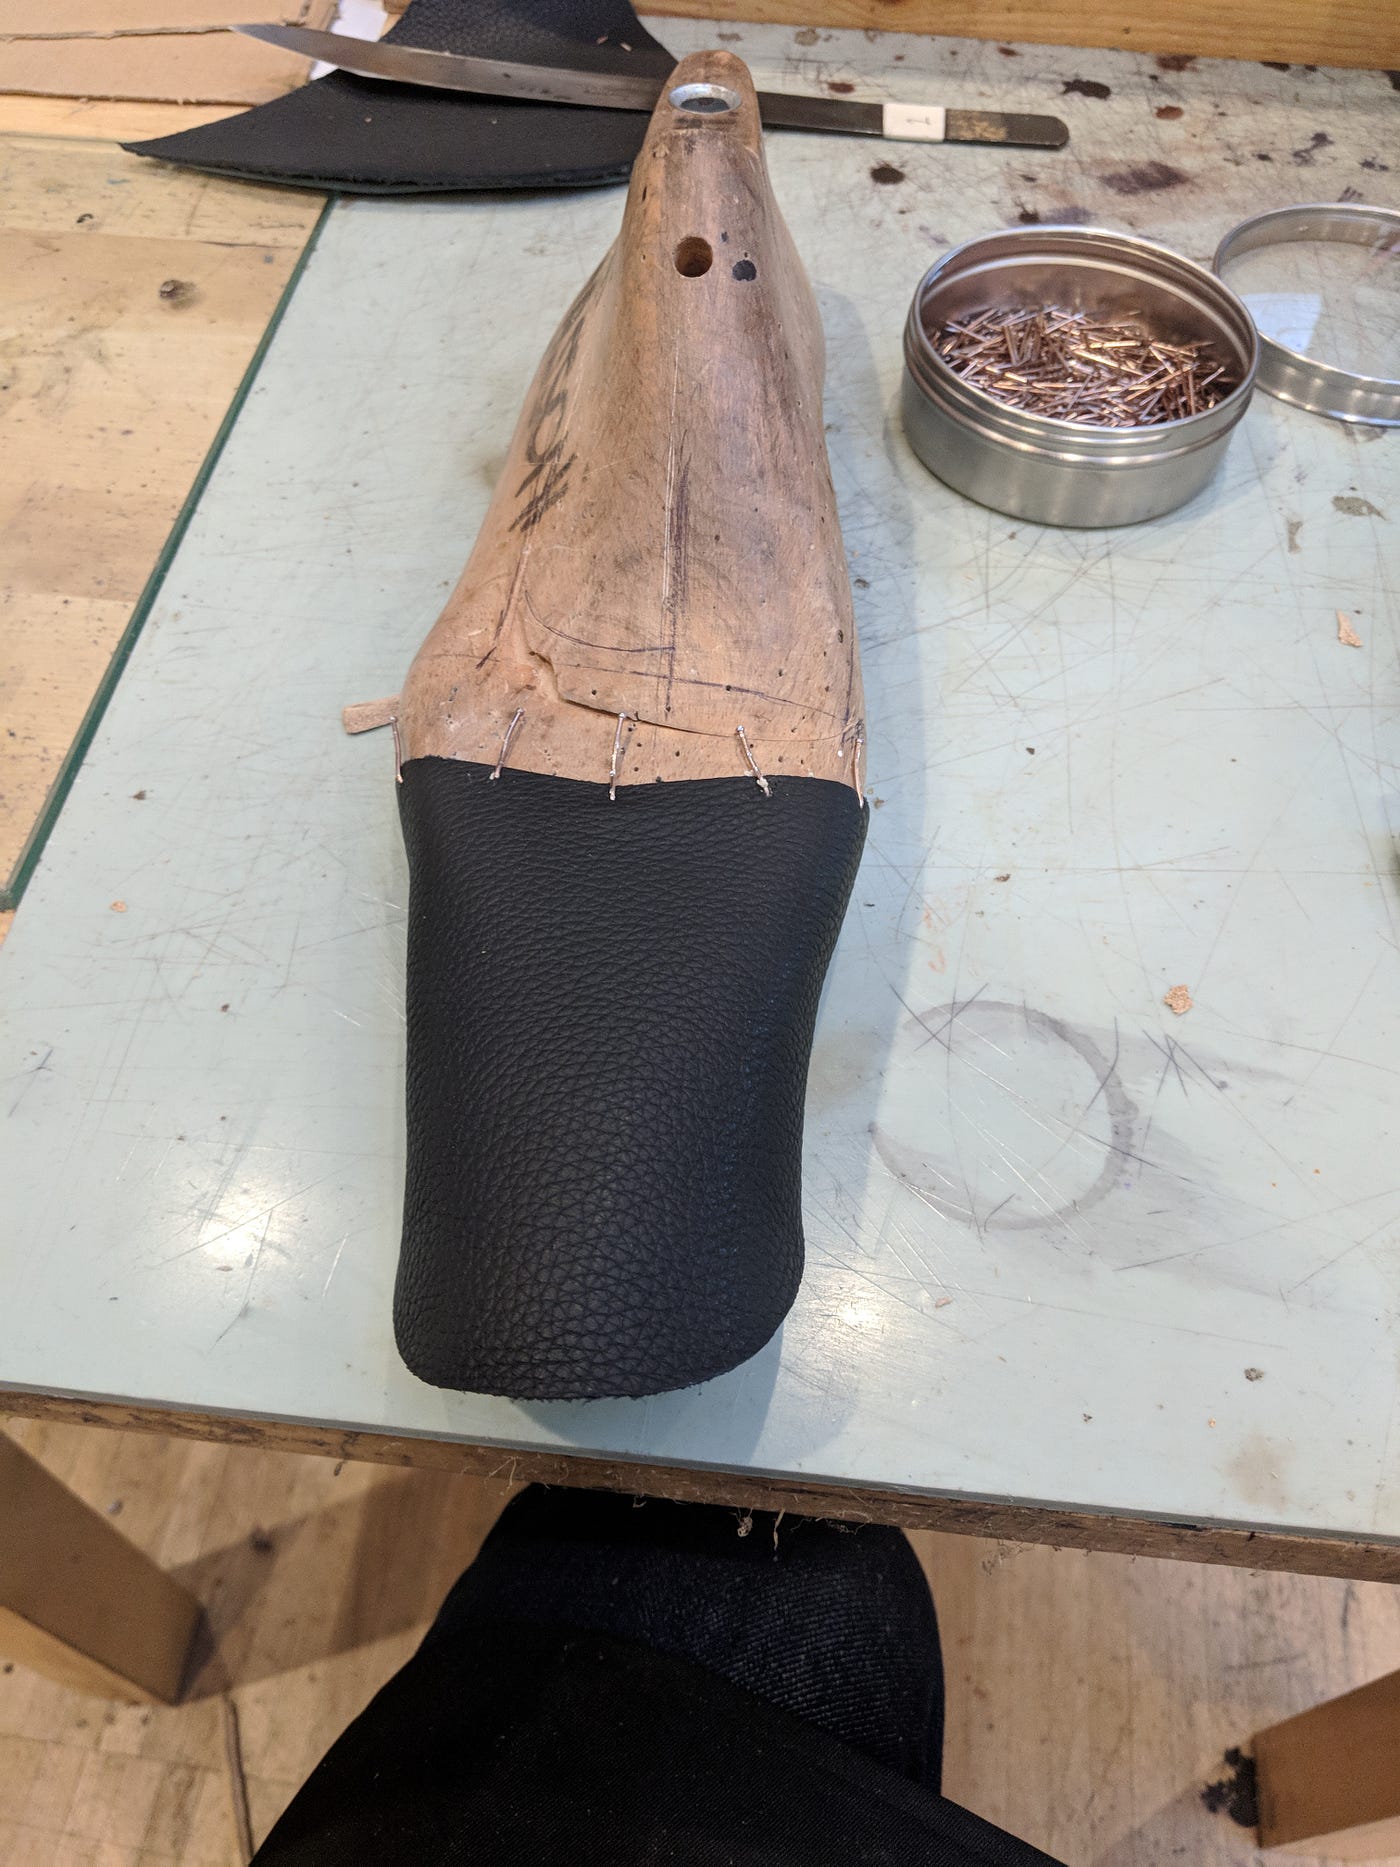
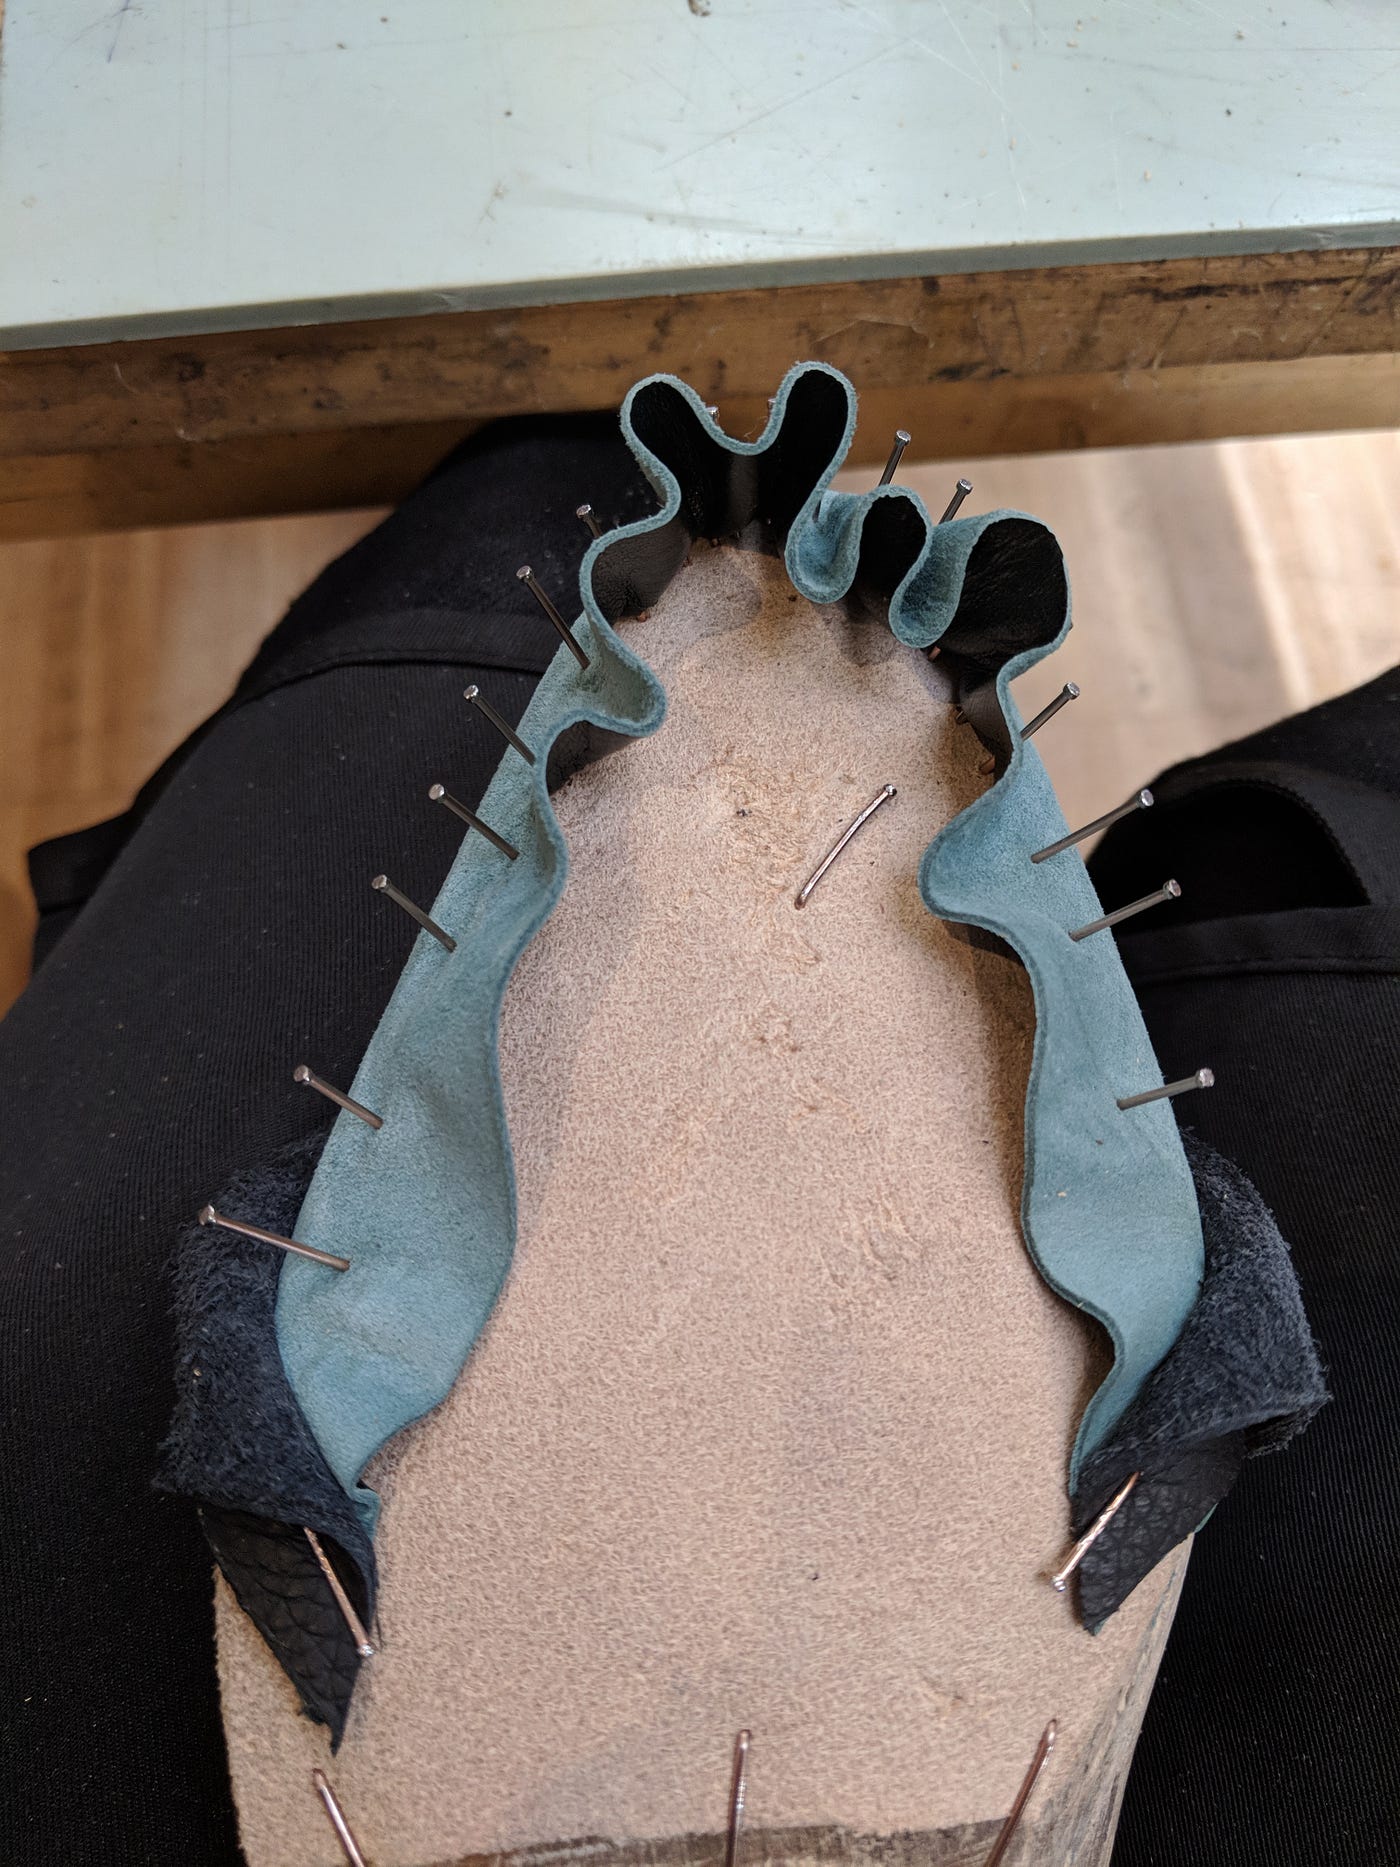
The general idea when you are lasting is to go in a star pattern. First, you stretch the toe down and hammer in a nail. Next, you can pick either the left or right side, then go with the opposite (at the toe). Finally, at the base you put in a nail on the outside, then the inside. Afterwards, you fill in the blanks everywhere you see bumps in the leather. It is better to pull it in towards you instead of just perpendicular on the edges, otherwise everything will bunch up at the toe (like in this pic).
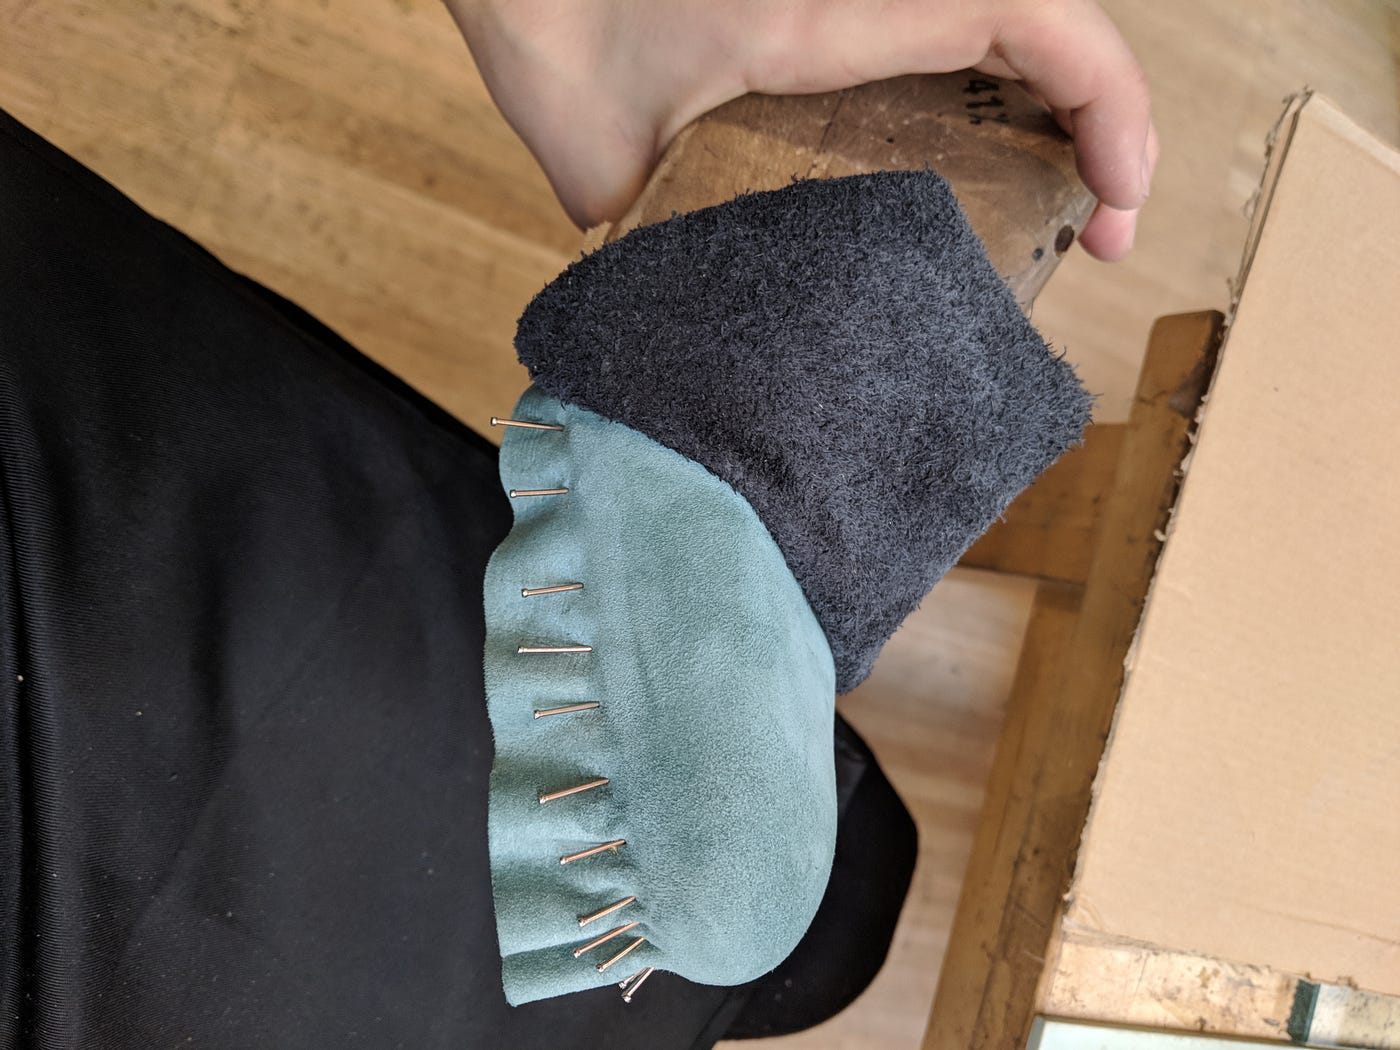
Once you have it lasted, use your bone tool to push the lining up like in this pic, and apply a generous amount of contact cement. Once that is dry, use your pliers to pull the lining down, stretching it evenly. After everything is dry, trim the excess leather.

Skive everything flush after its dry.

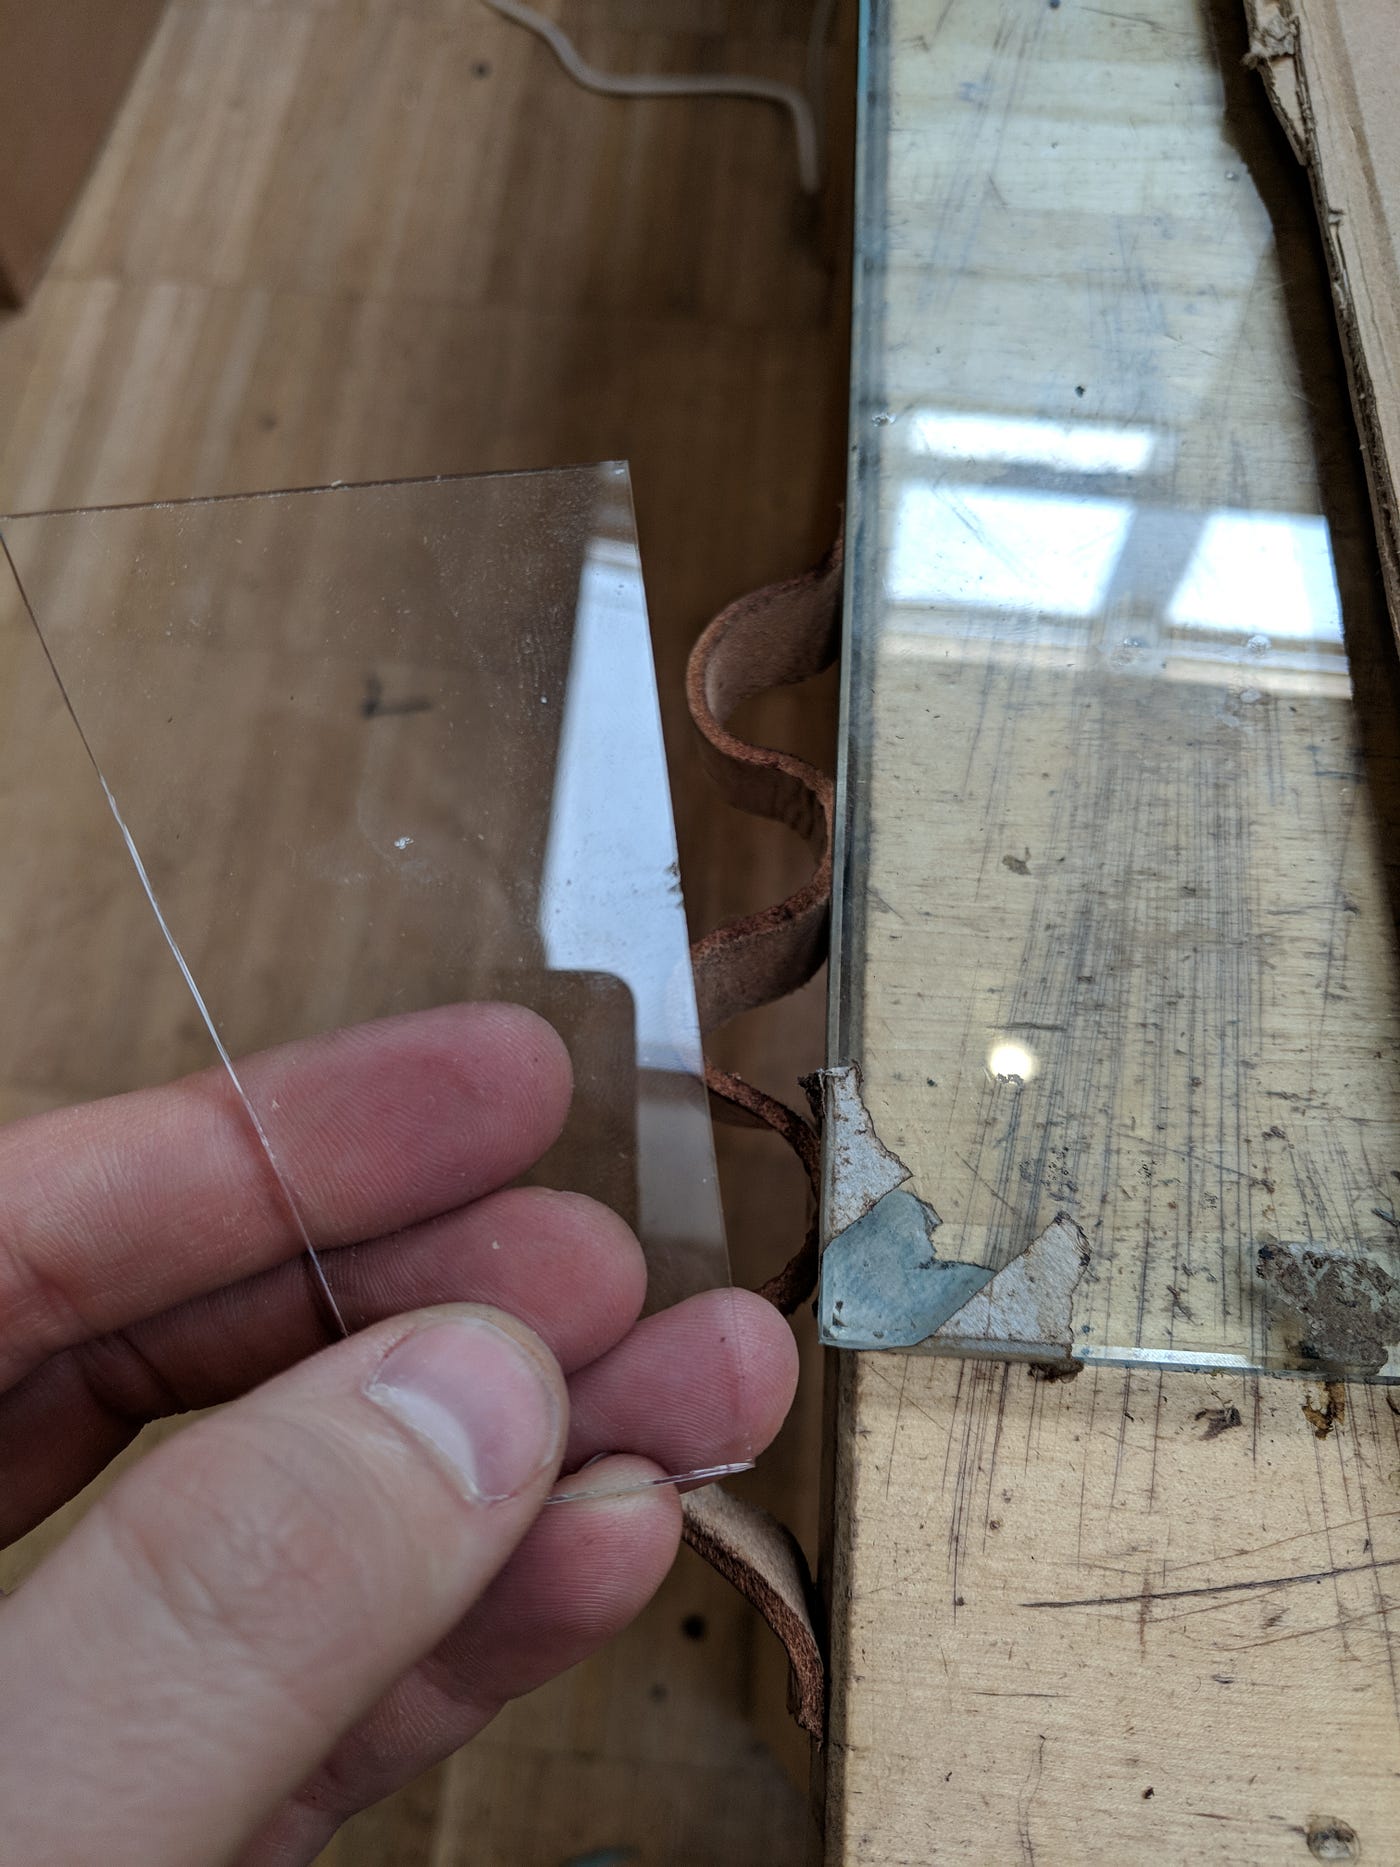
Glass is a very important tool for shoemaking. You have a few options for shaving things down, your knife, a rasp, sandpaper, or a piece of glass. You can get the most precision with a piece of glass. You an cut a piece to size by using a file on an small edge, then breaking it along that side.

Soak the toe puff approximately 15 minutes. Then, use the glass to shave off the skin side.

Apply stiffener (starch based glue) generously to the toe puff area.

Important to mark out the area where the toe puff will be. I screwed this one up by applying the toe puff skin side up, you should always do flesh side up since it will be attached to the flesh side of the upper.
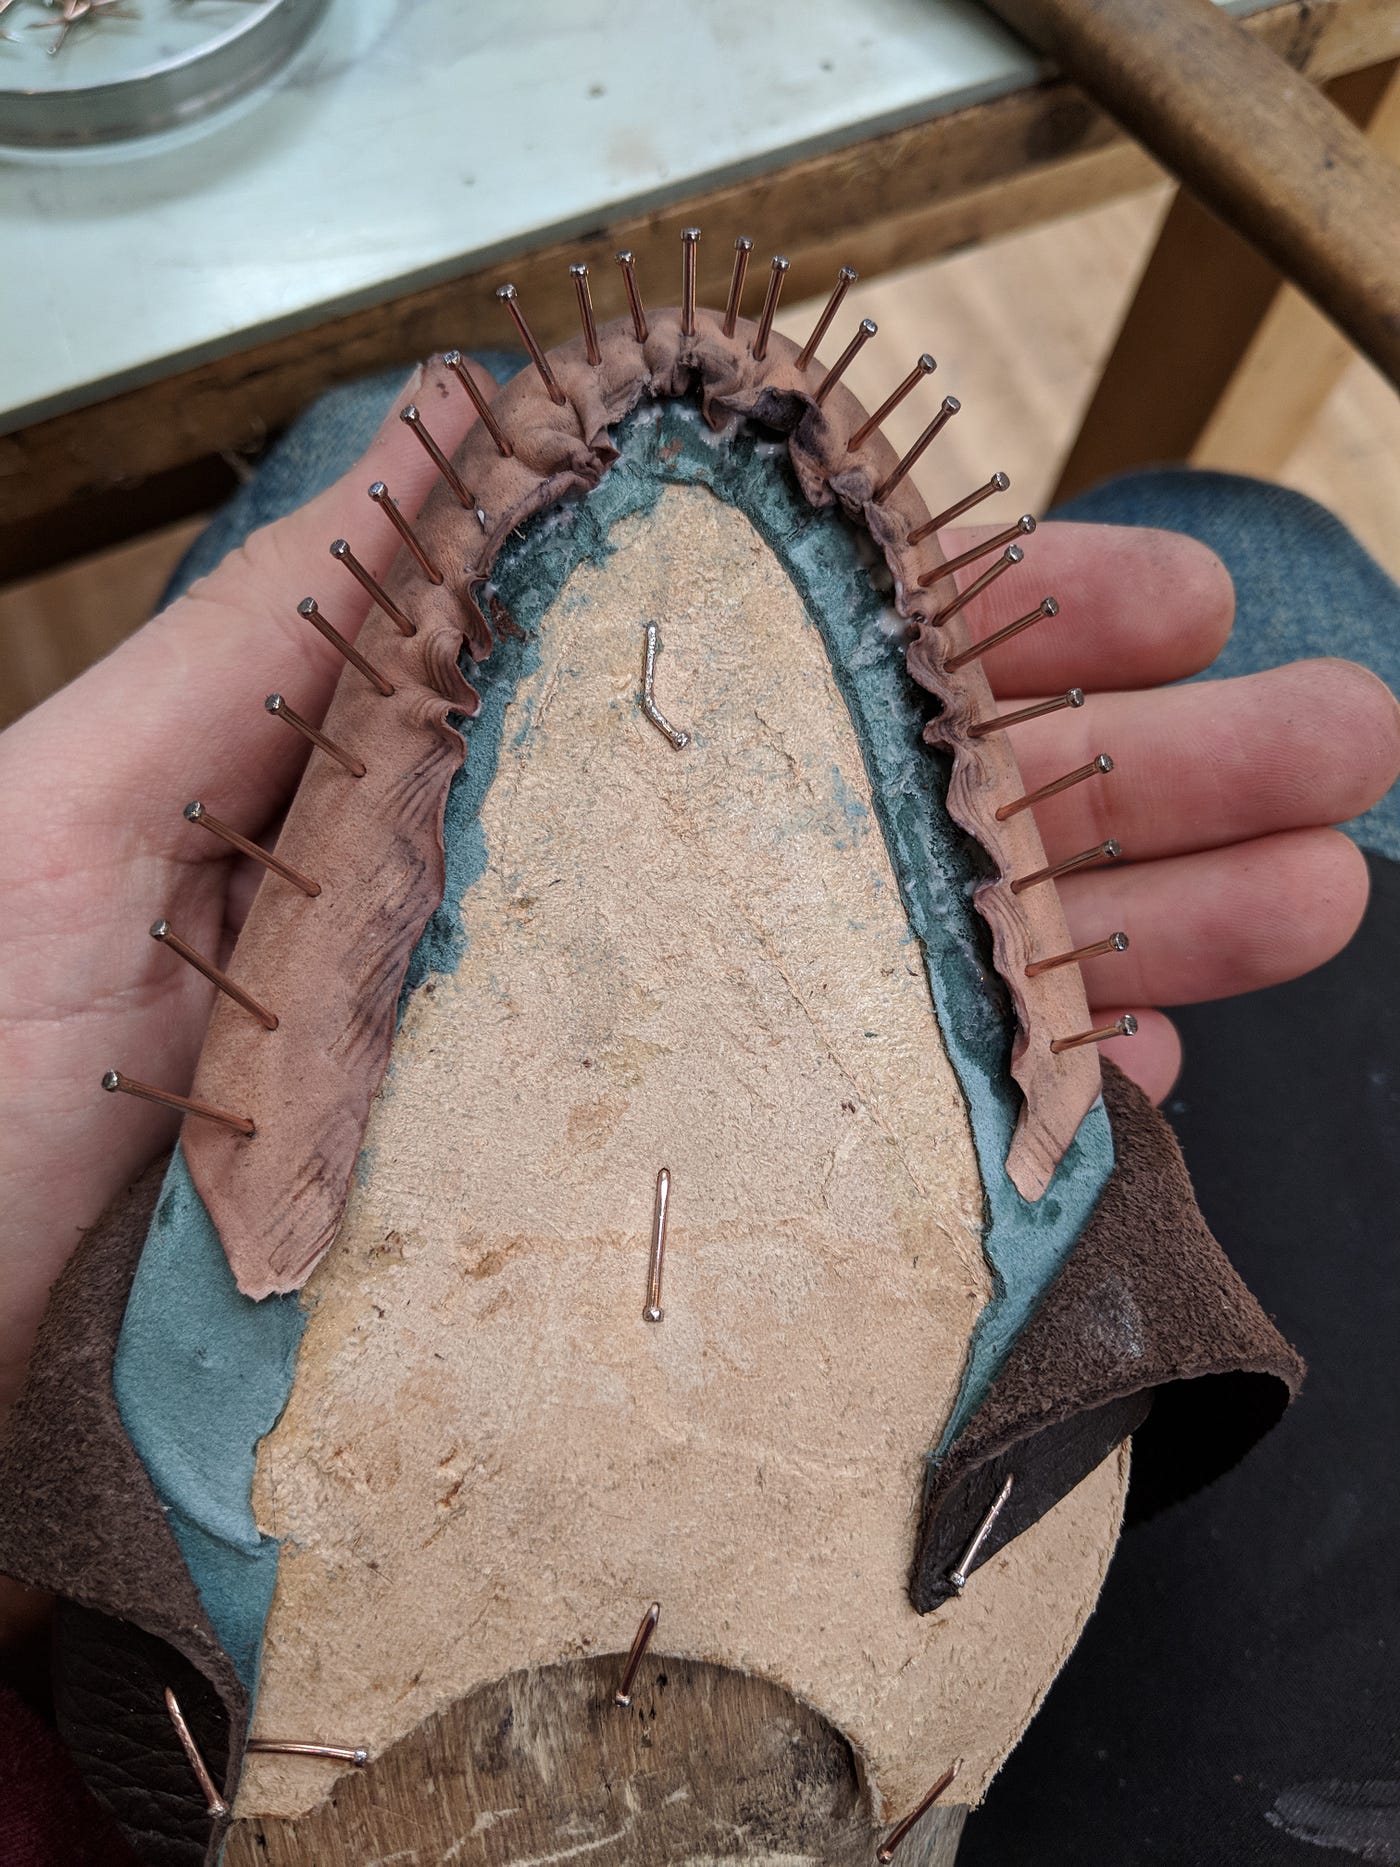
Toe puff lasted. The more nails the better here, since it will keep everything down. It is also important to nail them at about a 45 degree angle close to the edge.

Lay the nails down with the back end of your hammer. This helps smooth any bumps that persisted during the lasting process, and as you lay the nails down they stretch the leather more.

If you see any persistent bumps, you can add more nails even after you have lasted the toe puff. As you lay the nails flat, they will stretch the leather and lay the bumps flat.
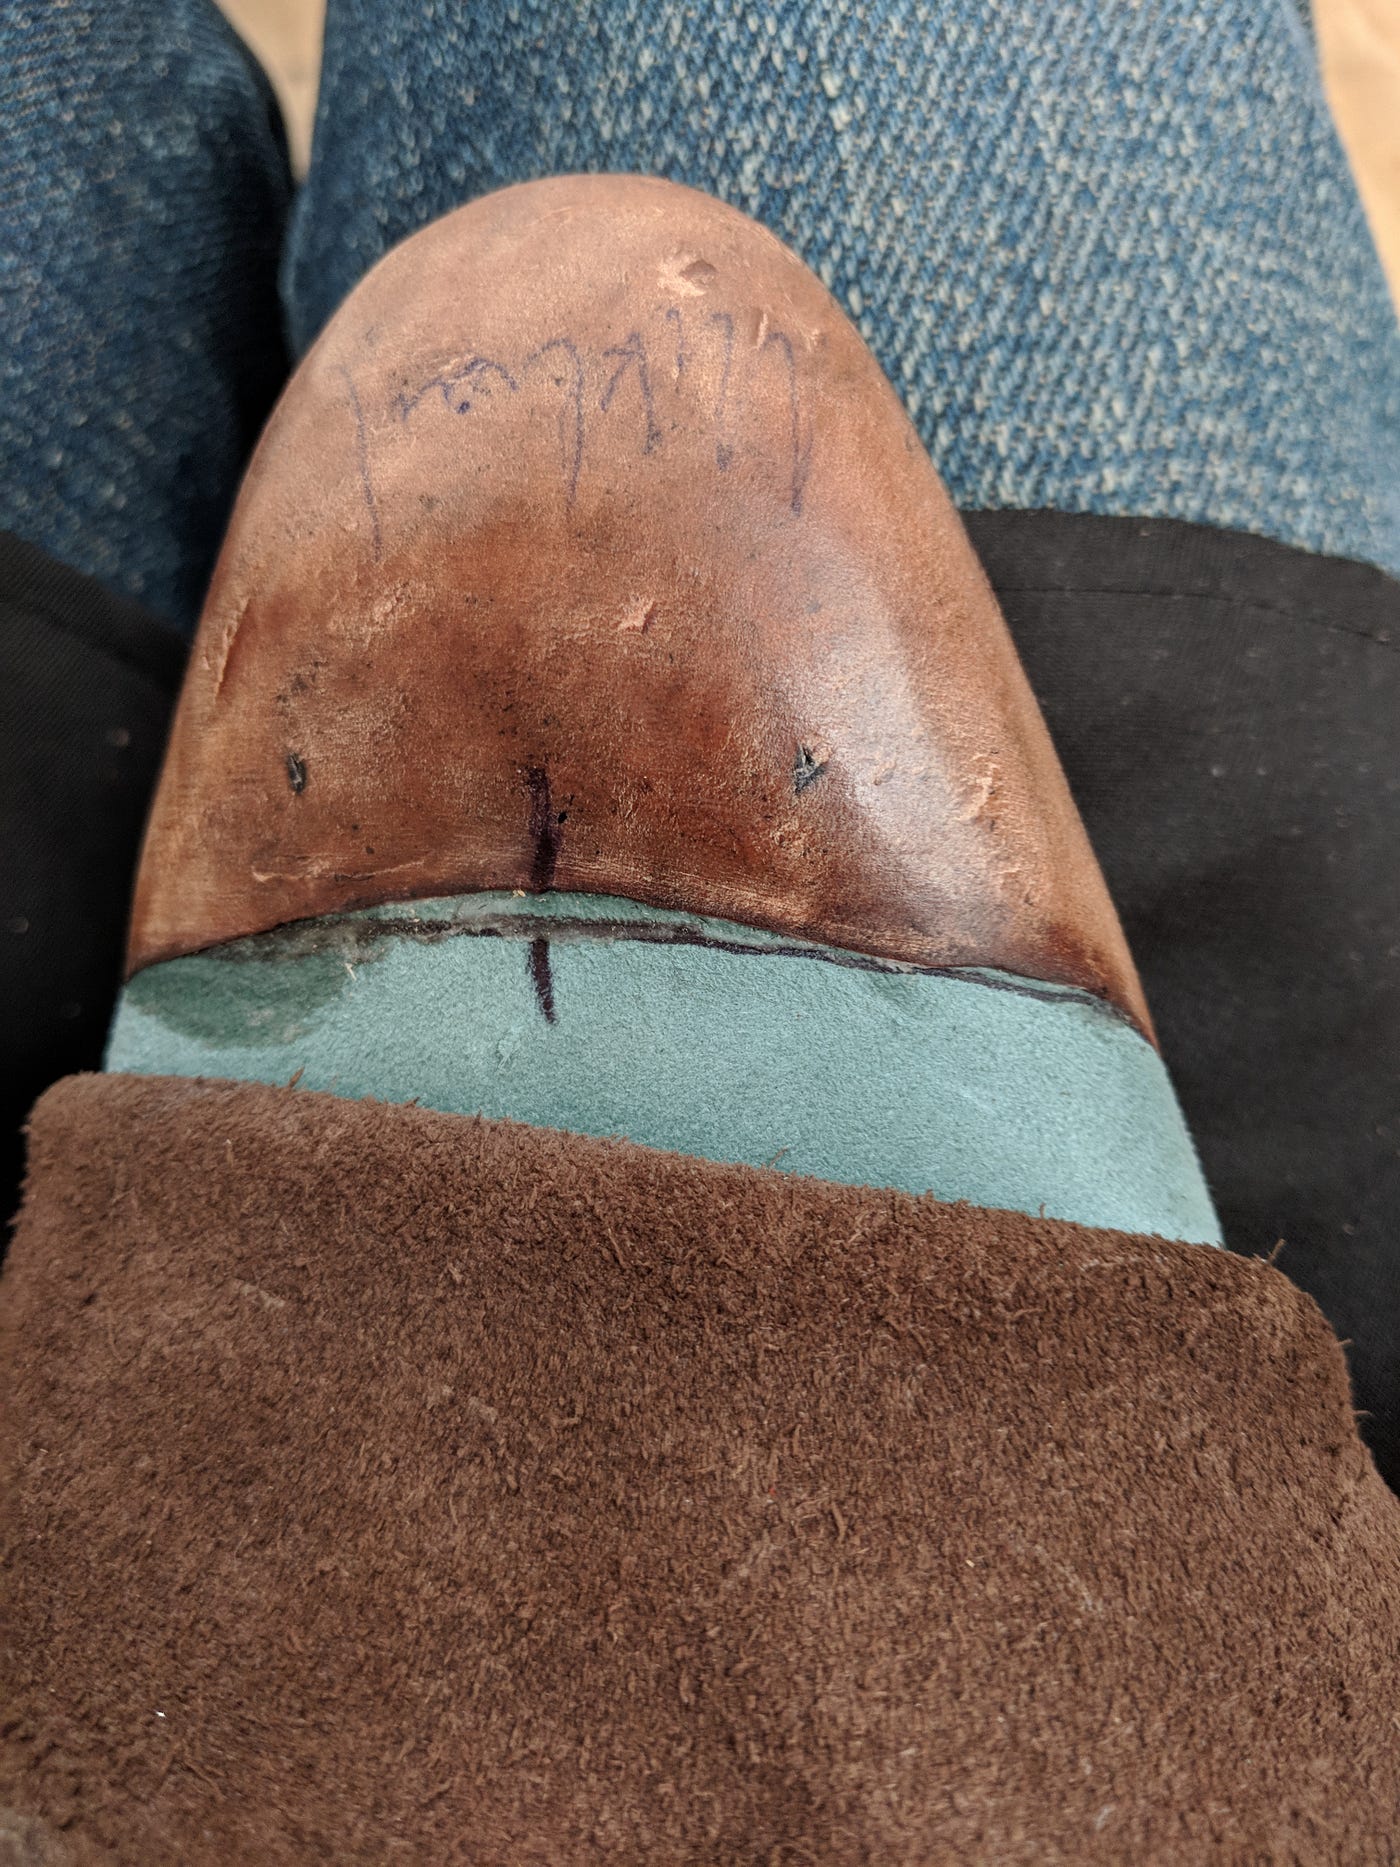
After you last the toe puff, it is important to compact the leather with your hammer. This step can take roughly 30 minutes. You apply the hammer in a sliding motion along the toe puff, instead of just head on. This helps shape the toe puff, as well as compact the leather and give it more strength. Keep going until the leather stops compressing and develops a shine.

You can tell that the toe shaping is done when there is a bright burnishing effect on the leather, and when you have it to the shape that you want it.

After you finish hammering, it is important to use a sandpaper or rasp to rough up the leather so it can absorb the next layer of glue. Also, it is very important to have a sharp transition on the last as shown here, there must be a distinct line between the flat portion of the last, and the curved part. You can accentuate this by using the rasp to file away at the base. You also need to sand the edges of the toe puff on the top side, so that the transition will be flush.

Lasted, with a toe puff!
This story has also been posted on my website www.arnoshoes.com
If you want to see my latest projects, give my Instagram page a follow.
