
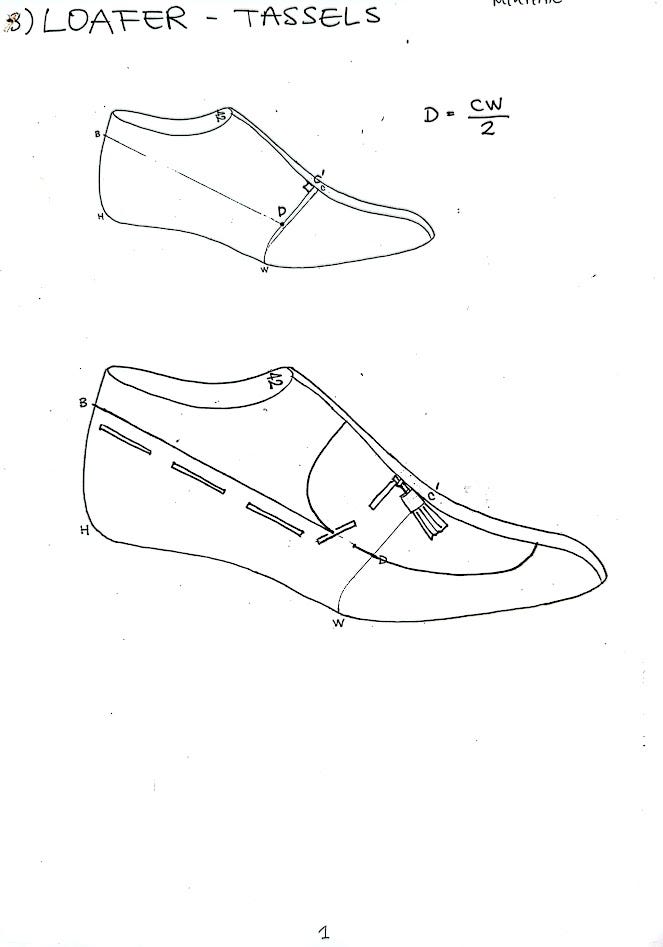
Making a Loafer Pattern
This is another iteration of the basic pattern making method that I use. I will document the process of making a loafer, but it should work for any variation — slippers, etc.
For the sake of brevity, I will not go over all the basic steps like taping off the last and finding the critical points on it. Those are all covered in the other pattern making guides I have posted.

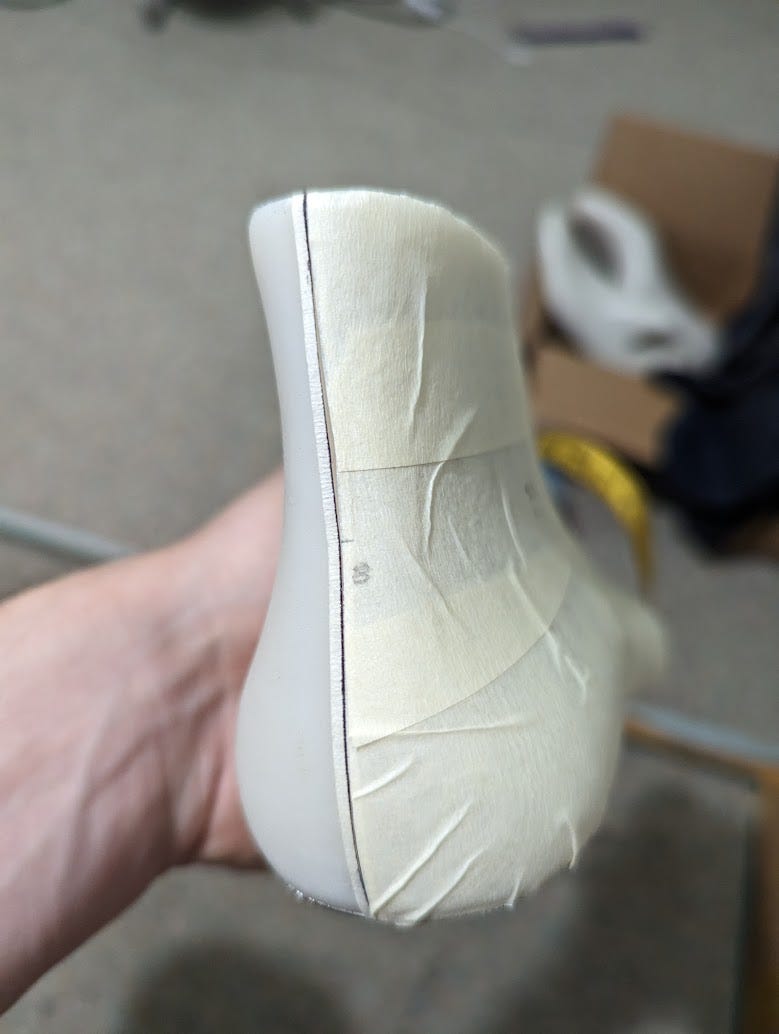
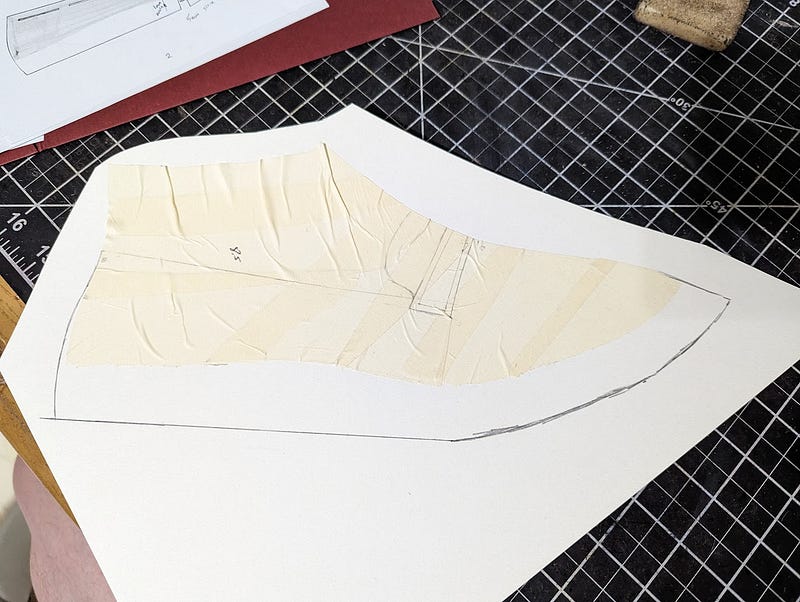
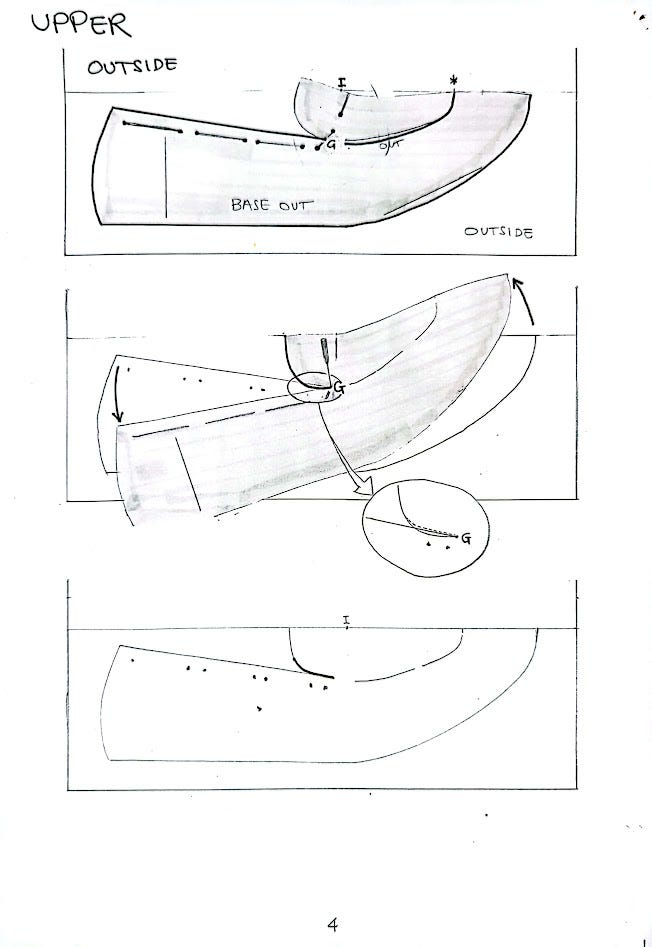
Find your C’, B, and G points, then connect your lines. They should intersect at G. These will be your guidelines for drawing out the design of your loafer.
You can use the B-G line as your topline. I shifted mine up a bit here based on the look that I wanted. At this point, you essentially have a basic slipper pattern.
And to turn it into a loafer, you just add a little design on the facing. This is all personal preference at this point.
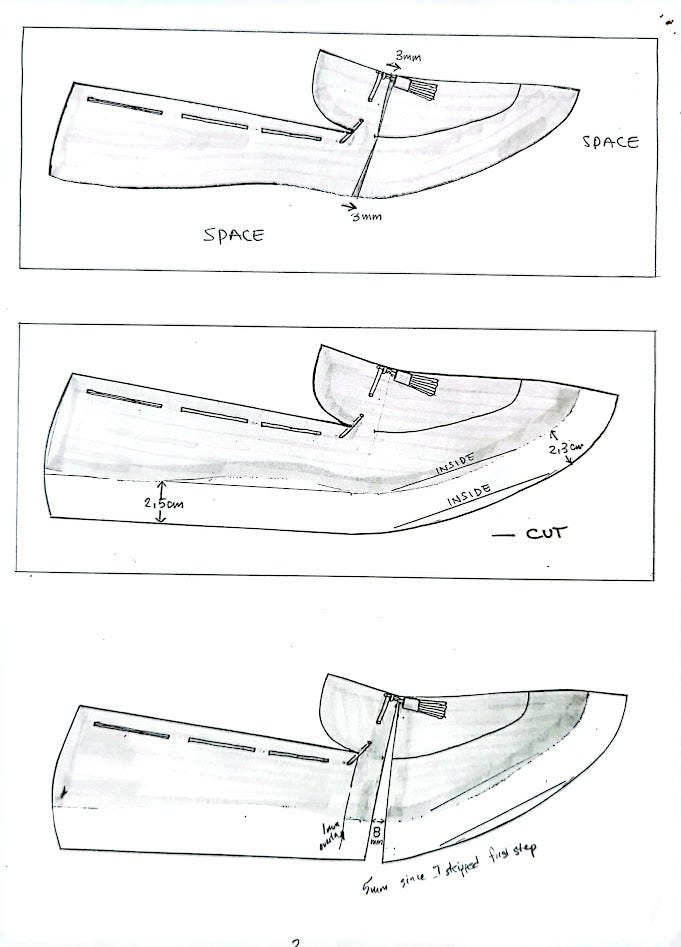
Transfer your tape to paper, making sure to do the 3mm overlap along the ball joint line (at the C point) similar to the other pattern making guides I previously posted. Also add your 2.5 cm lasting allowance to the base.

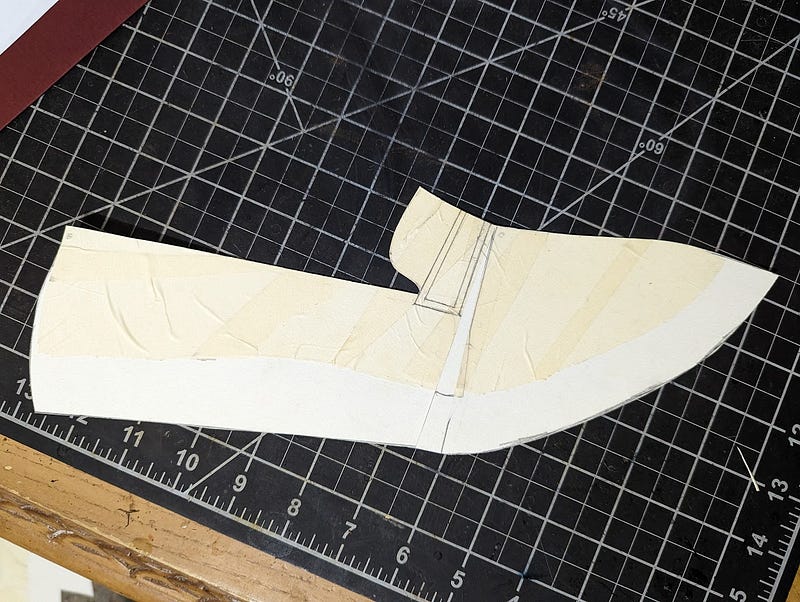
Next, add spring your pattern a bit along the C line by adding 8 mm to the pattern base (measured along the base of the tape line), for shoes it is only 5 mm.

Cut out all of your lines so you can easily transfer it to your pattern. I ended up adding a small heel counter to cover the back seam, and the line toward the back is for the lining counter. I usually invert the lining so it is roughout there.
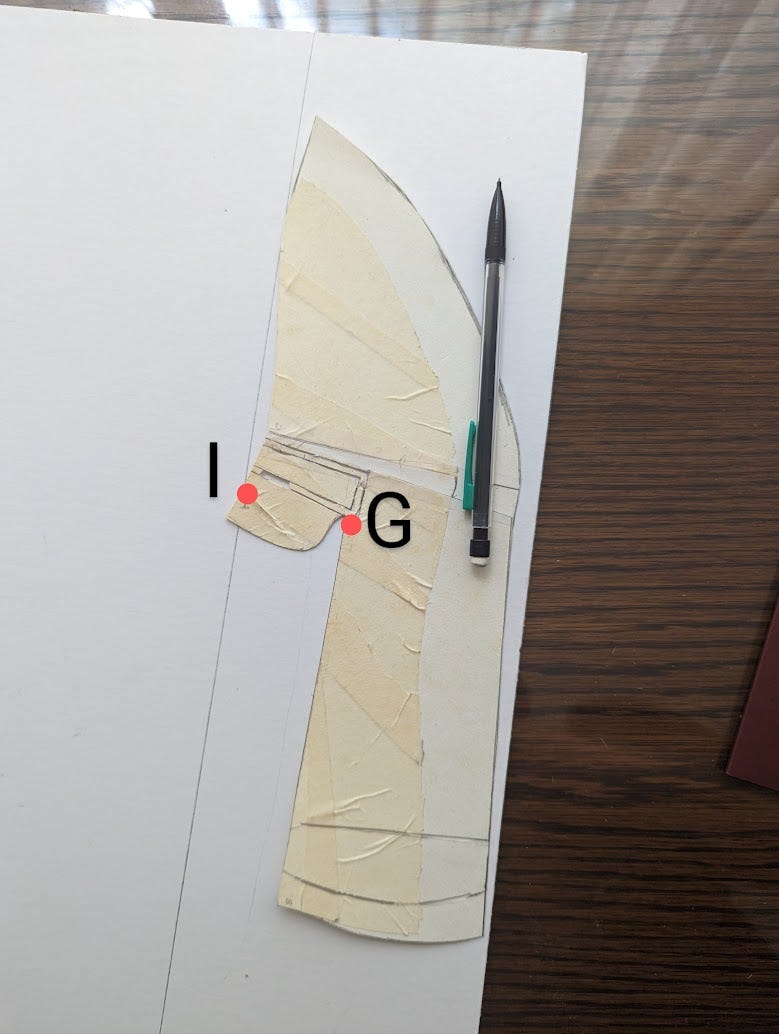
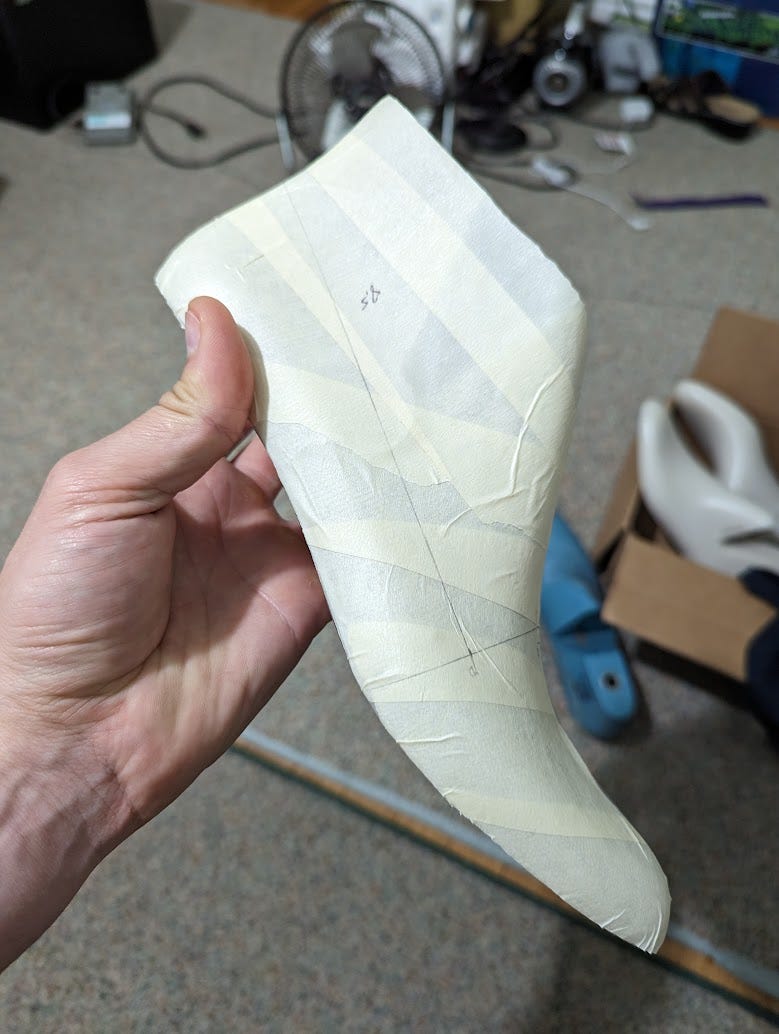
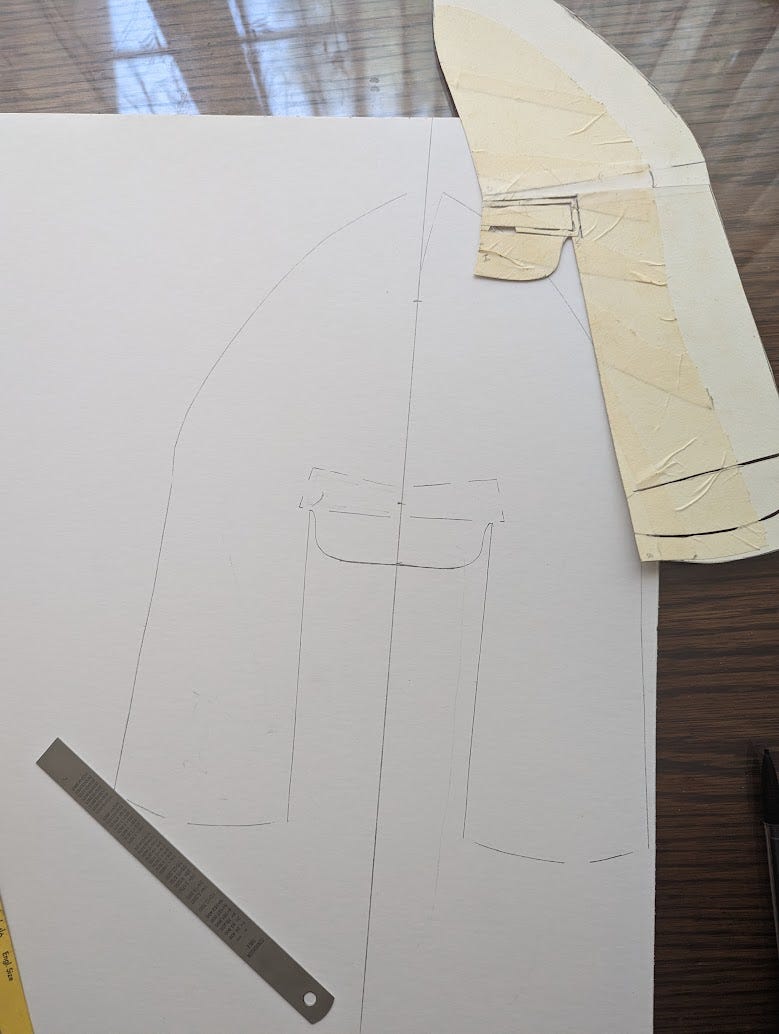
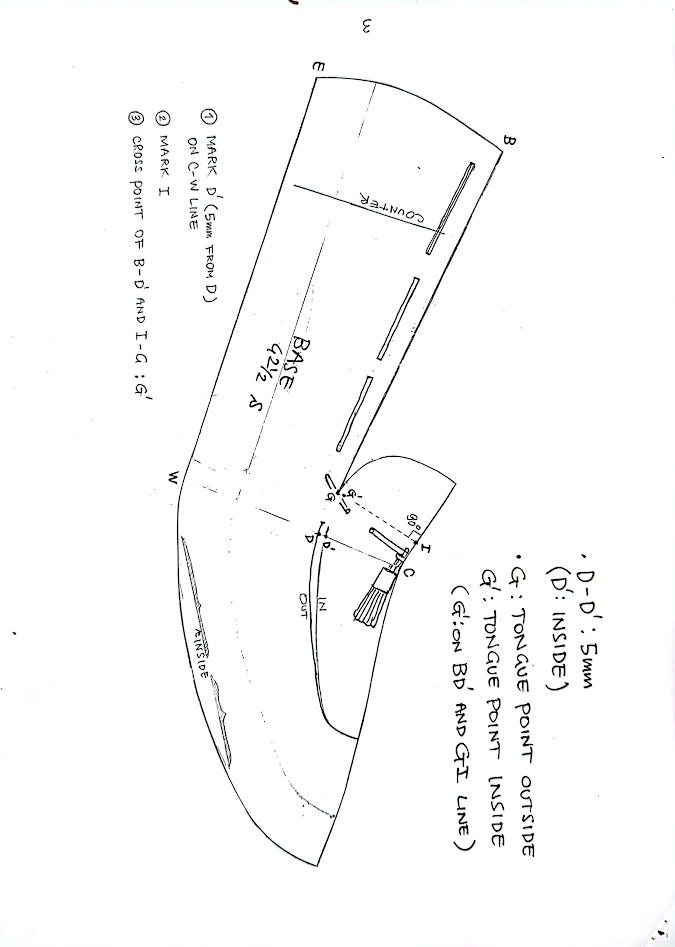
The G point is where your topline meets with the facing. If you draw a perpendicular line from there, that is where your I point. Mirror your pattern around the I point, and the highest point along the centerline of your pattern base. Draw everything except the facing at this point.
Note how you have space between the center line and the pattern here. If you have a moc toe, you should adjust the line inward because adding this extra space will make your moc stitch line wider.
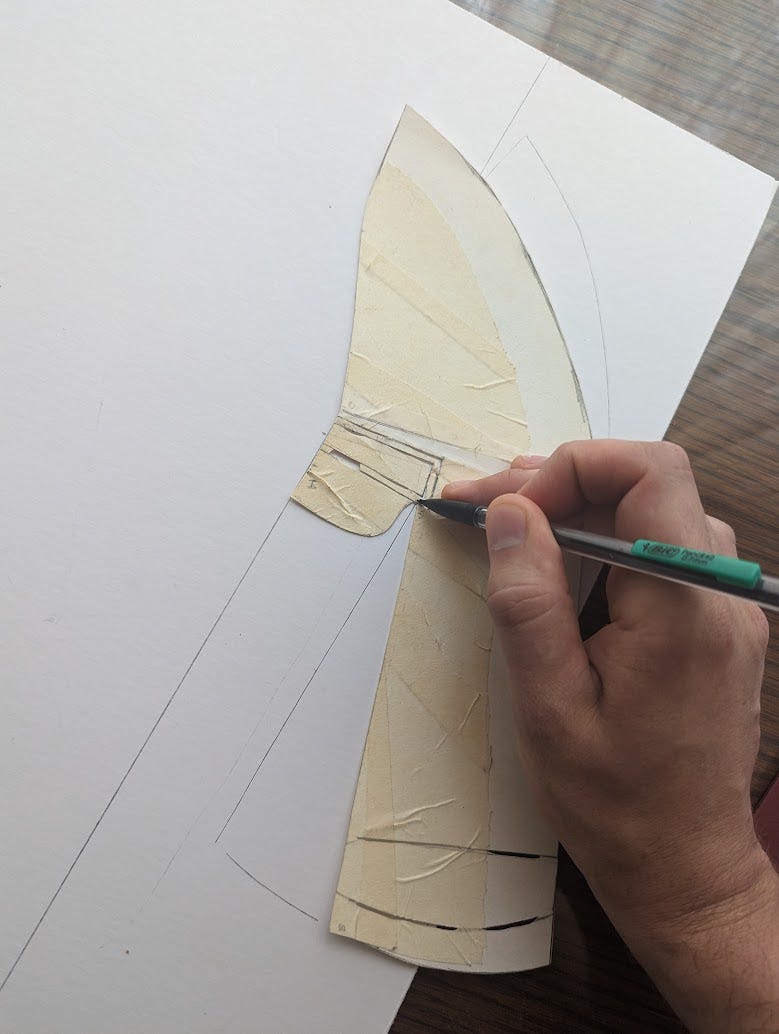
Hold your pattern down at the G point (useful to do it with the pencil), and pivot it until the facing lines up with your centerline. Now draw the facing in.

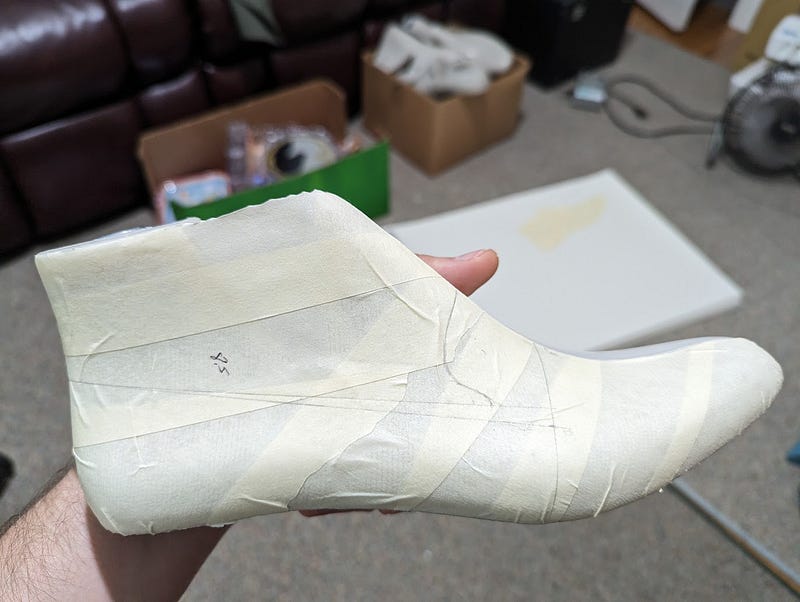
Now copy that for the other side. I mark the G point and the tallest point on the other side and on the paper to make sure that the pattern base gets mirrored at the correct points. Pivot around the G point to get the facing to line up properly.
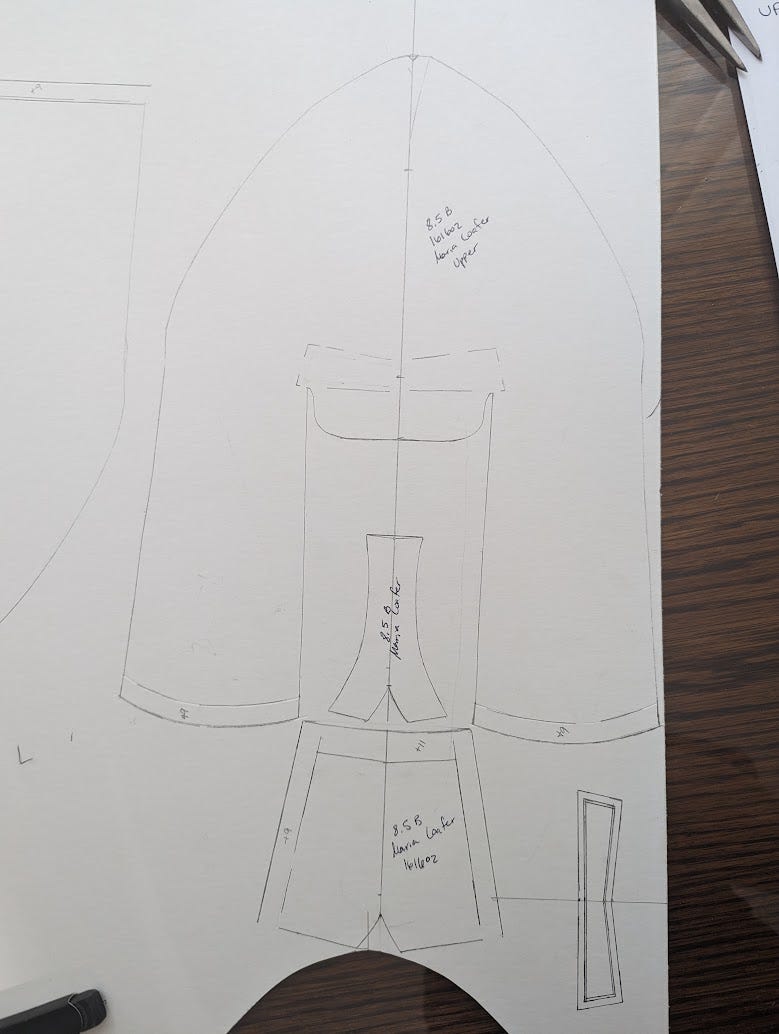
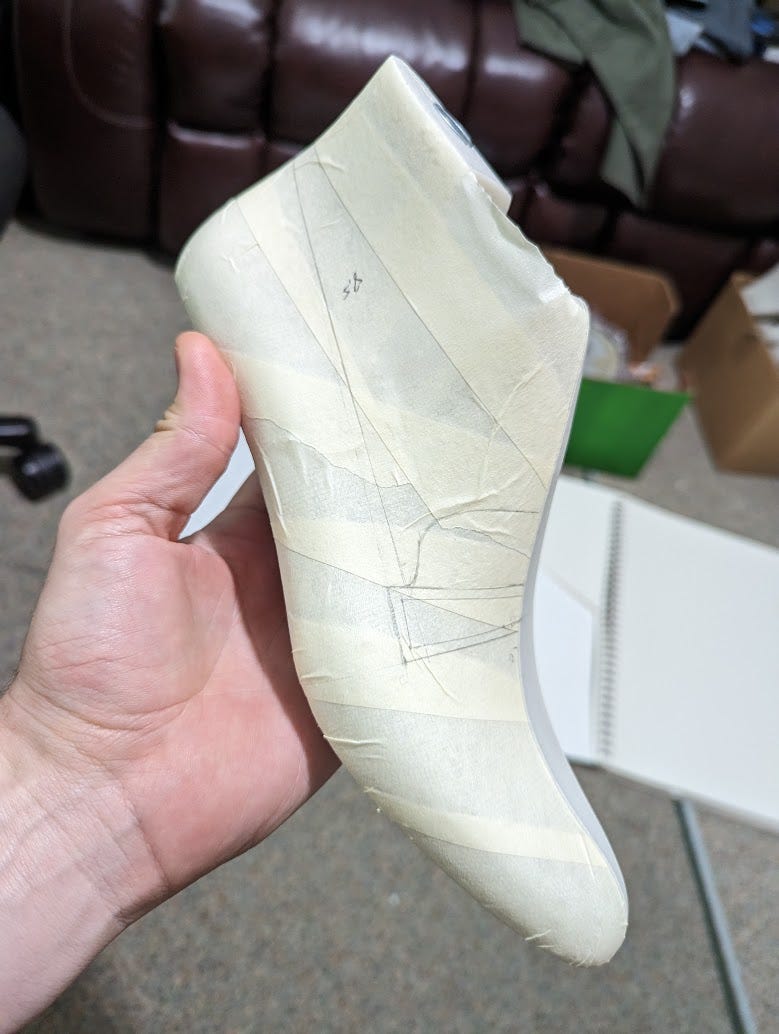
The rest of the pattern pieces drawn out.
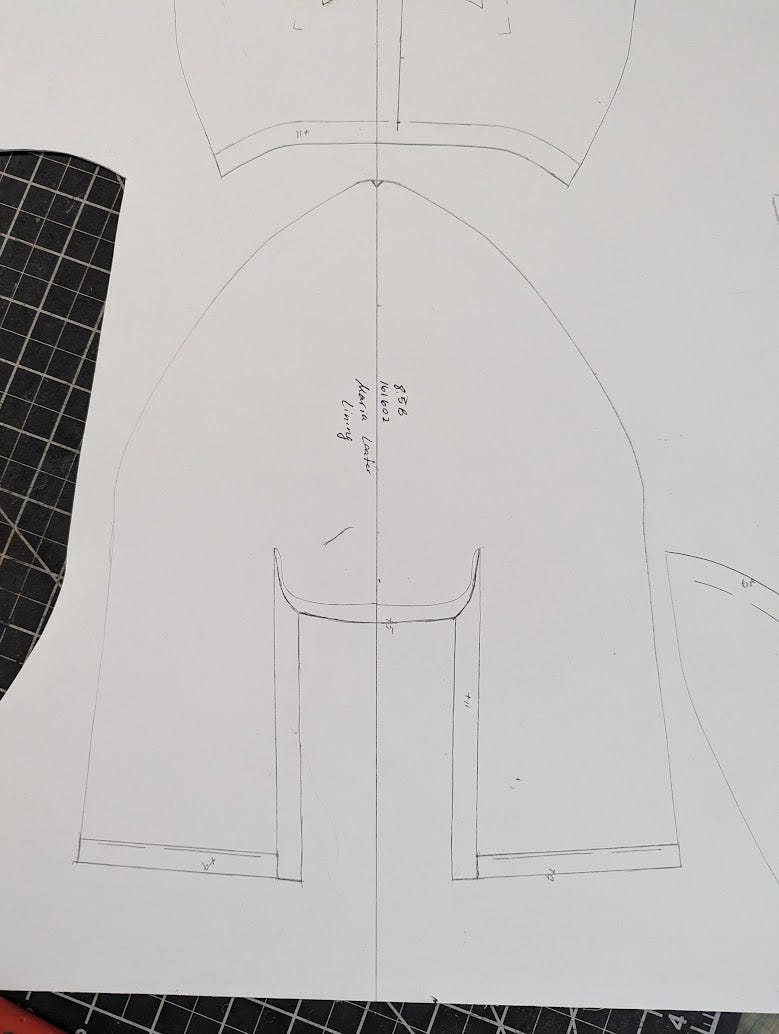
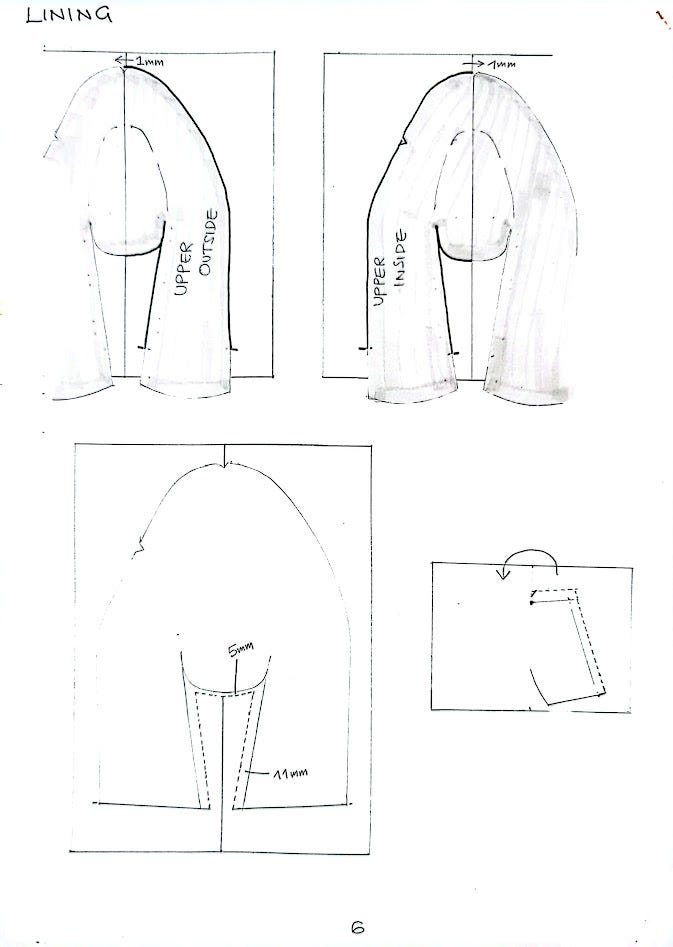
Lining is the same as the upper, but make sure to add some extra to the entire topline. I do about 1 cm.

Pattern pieces cut out. I don’t have pics of how to make the “shorts” for the heel piece of the lining. I covered those in the derby pattern guide. You can make one and reuse it for all of your patterns (unless the size difference is drastic).
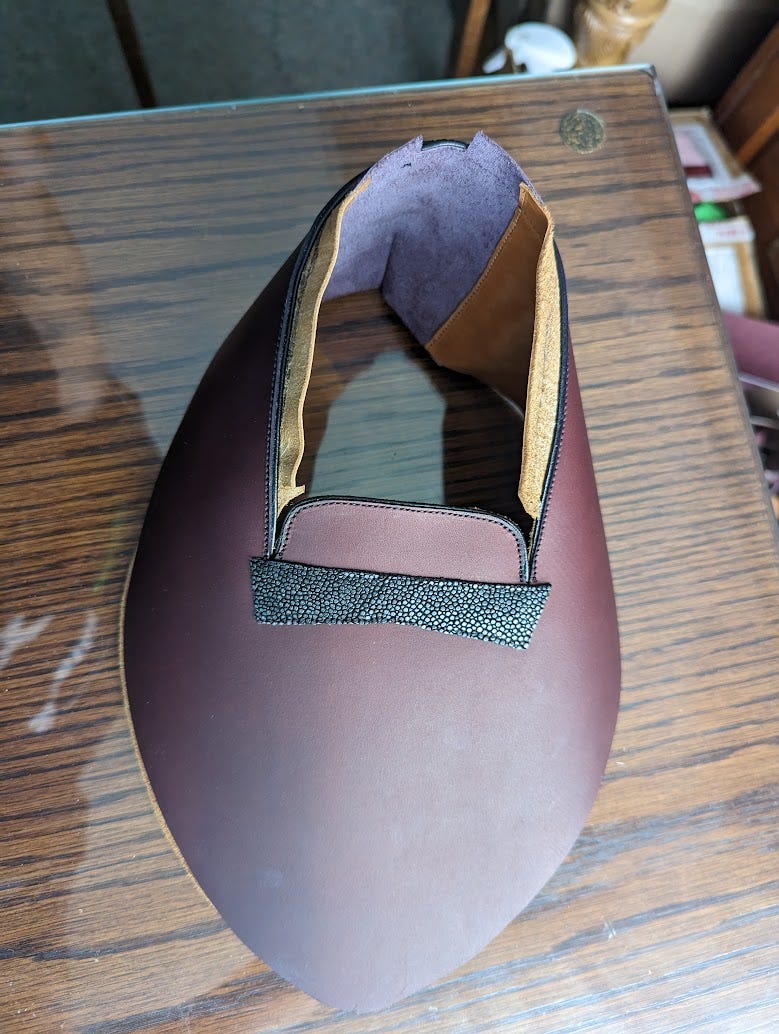
Assembled upper. Note how I made a mistake and trimmed the lining along the top of the facing. Don’t do that, it will screw with you while lasting. I ended up having to put several nails into the facing along the stitching to keep the facing from shifting down as I was pulling on the toe.
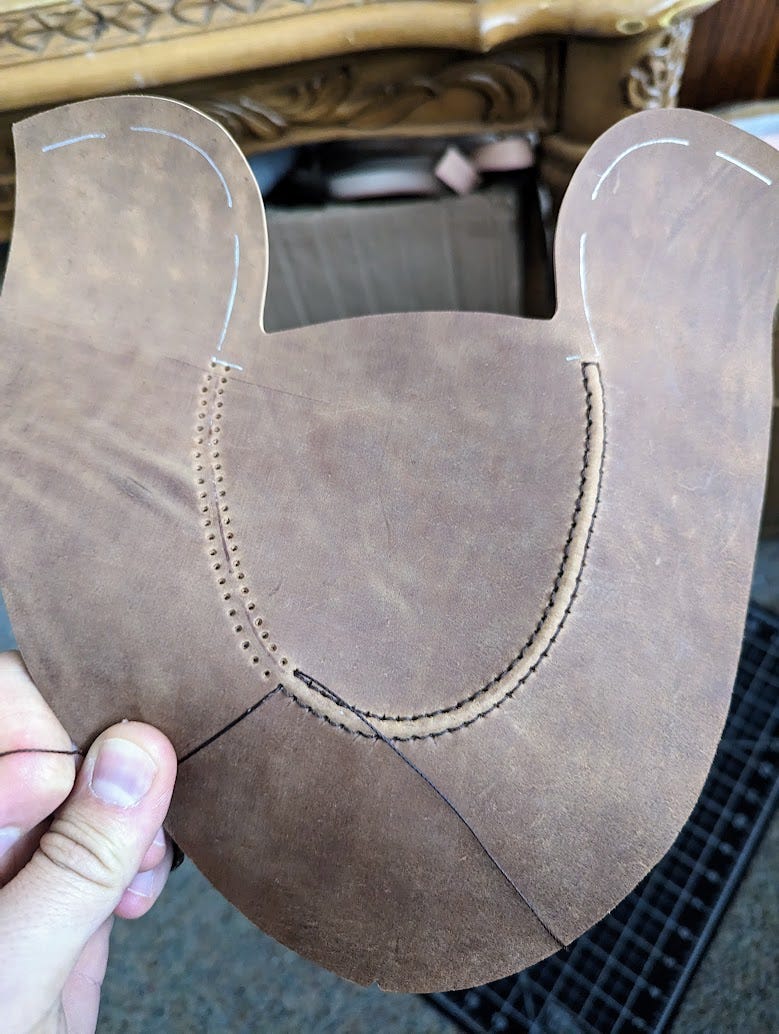
A popular style for loafers is to have a moc toe. I unfortunately didn’t take any good pictures of the entire process, but you would draw out your stitch line on your taped off last initially. Do the same process to mirror it when you create your pattern. Draw it out on your vamps when you cut them out. Then, draw two parallel lines along it, one on the outer side one on the inside. You can play with the spacing, I did 2 mm on either side here. Then use a compass to mark out your stitch holes, I kept them at a 4 mm spacing, so the stitches were 4x4. I have done them since as 3x3, but it gets a little bit tight around the toe with my hole punch so I am not sure I can make them smaller. Make sure they line up correctly, as the line starts curving your inner holes should have smaller spacing. I stopped using the compass as the curve started and just eyeballed it, making sure the holes are perpendicular to the line. Afterwards punch them out with a small hole punch and do a saddle stitch keeping even tension on each stitch.
You could theoretically also mark everything out and stitch it with an awl while it is on the last. In my opinion it looks much better that way, but it is also much harder to pull off.

Here is an example of a slipper using this pattern method. It’s basically a loafer without the facing.

And here is a finished pic of the loafers I was making with that pattern.
Below are pics of the reference material I used.

To keep up with my current projects, give my Instagram page a follow